


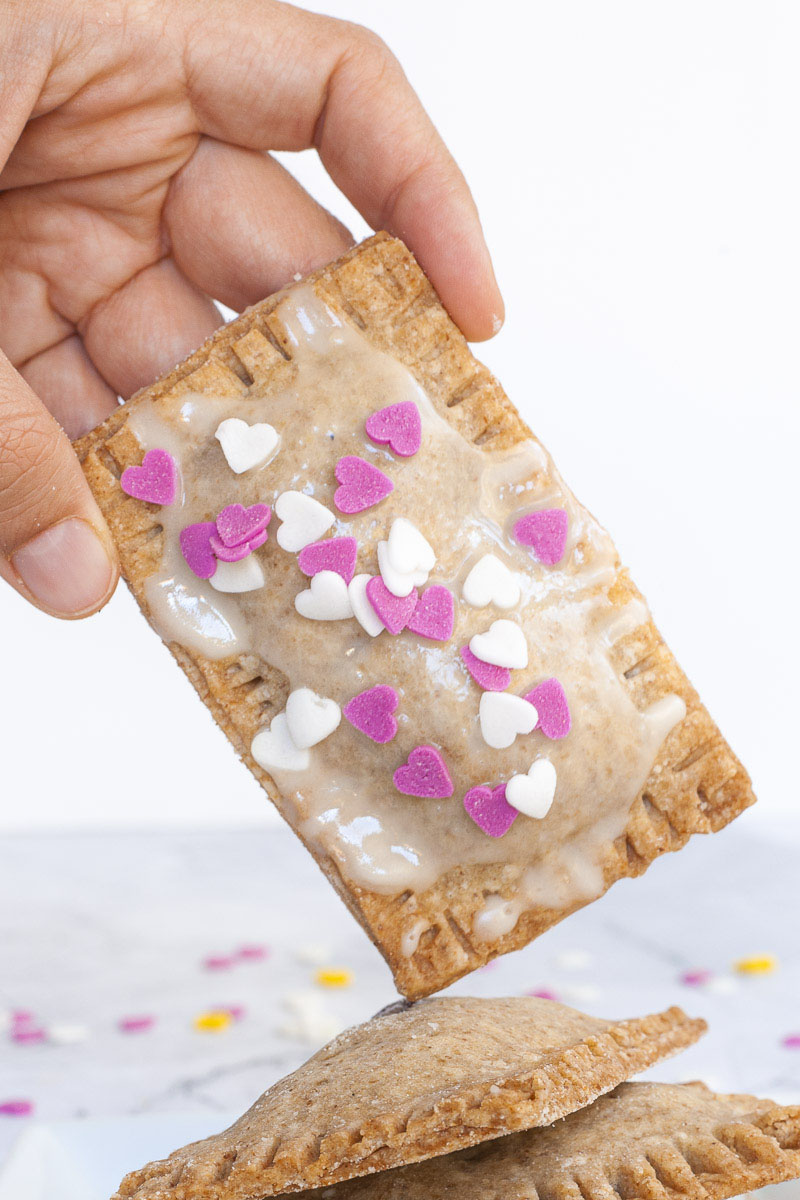
Are Pop-Tarts vegan? Some, but you don’t miss them if you try this delicious homemade vegan pop tarts recipe! Choose among 3 different flavors: frosted strawberry, brown sugar cinnamon, and cinnamon apple pie, or make your own favorite. You’ll love it either way. They are flaky and crispy. Perfect for a sweet breakfast or snack.
Want to save this post?
Enter your email below and get it sent straight to your inbox. Plus, I’ll send you budget recipes and money-saving tips every week!
It is astonishing what you can do with a simple pie crust. Obviously you can make delicious apple crisp pie, baked vegan pumpkin cheesecake, or this easy vegan custard tart, but you can also make delicious pop tarts as well. Let us show you how below.
Are Pop-Tarts vegan?
While Pop-Tarts are one of the most popular toaster pastries, as far as I know, only 3 flavors are vegan: unfrosted strawberry pop tarts, unfrosted blueberry pot tarts, and unfrosted brown sugar cinnamon pop tarts. All others contain non-vegan ingredients like dairy (whey), egg whites, carmine, or gelatin.
Even if they were vegan, they have so many questionable ingredients like high fructose corn syrup or palm oil. What is red 40 or yellow 6 food coloring anyway? I usually prefer to know what I am eating.
Subscribe to our newsletters and download it right now.
But more importantly, none of them are gluten-free. Don’t worry I got you covered with my delicious homemade not only vegan but gluten-free pop tarts. No weird ingredients you cannot pronounce or don’t know where to buy.
What to expect from this recipe?
If you make this vegan pop tart recipe, this is what you’ll get:
- It is a 5-ingredient pastry dough with only simple ingredients that you can find in your pantry.
- No kneading is needed since you can make the dough in a food processor within 5 minutes.
- It is easy to roll out, cut, and shape.
- Baked pop tarts are crispy, crunchy, and flaky.
- This recipe includes probably the 3 easiest vegan pop tart flavors.
Ingredients
We used our vegan gluten-free pie crust recipe to make these homemade pop tarts. It is a 5 ingredient recipe since we used a homemade flour blend, but it really only is flour, sugar, and butter.
- Buckwheat flour – You can use a store-bought gluten-free flour blend instead of these 3. Or if you don’t need it to be gluten-free, this recipe also works with classic all-purpose flour.
- White or brown rice flour
- Tapioca starch – You can substitute it with corn starch for sure. We haven’t tested this recipe with any other tapioca flour substitutes.
- Cane sugar – You can use another dry sweetener like white sugar, brown sugar, or even coconut sugar. You need to adjust the amount of butter if you decide to use liquid sweeteners like maple syrup or honey (although honey is not vegan).
- Vegan butter – I found that the best vegan butter for baking is coconut oil based, like Earth Balance or Miyoko’s. You can even substitute plain coconut oil to make this dough.
🛒 You can find detailed measurements for all ingredients in the printable version of the recipe card at the bottom of this post.
Instructions
Mixing the dough
- Add all dry ingredients to the food processor (buckwheat flour, rice flour, cane sugar, and tapioca starch). Pulse once to combine.
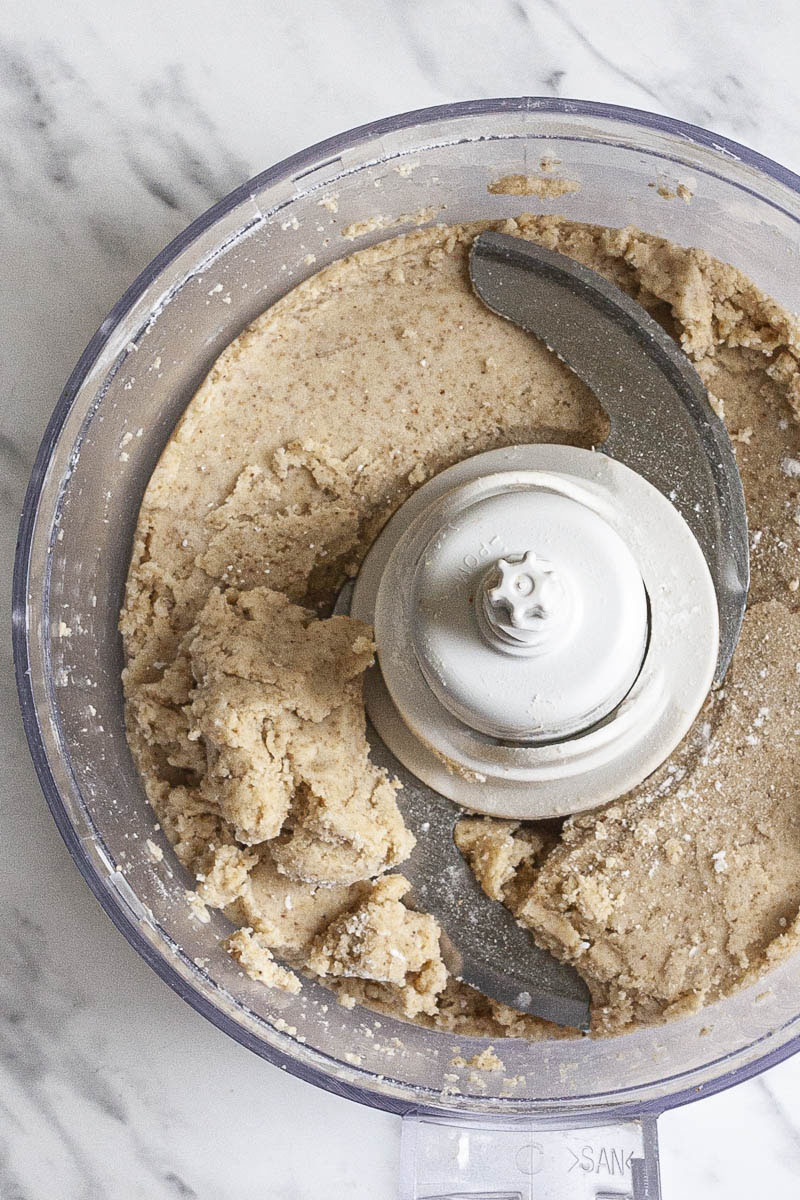
- Add cold vegan butter in cubes and pulse until you have a crumble-like texture (see the below picture).
- Add cold water 1 Tablespoon at a time. How much you need at the end depends on whether you have whole grain buckwheat or not, white or brown rice flour, or which starch you are using.
How do you know it is the right consistency? Test it. Take a handful and see if you can roll a ball easily. It should stick together, but not too wet so that it sticks to your hand as well. It may seem crumbly in the food processor but forming a ball can still be easy. See the below picture for reference.

Rolling out the dough
- Separate the dough in half. One for the bottom and one for the top.
- Chill the dough in the fridge for 15-20 minutes if you feel that the dough is easy to handle.
- Roll out one ball on a non-stick parchment paper or baking sheet directly. That way you don’t need to transfer it anywhere. I usually use rice flour for dusting as it has a grainy texture and the dough is just sliding so easily on it.
- I use a rolling mat with measurements (similar to this one*). If you find that the dough sticks to the rolling pin dust it with rice flour or cover the dough with plastic wrap and roll it like that.
- Never go thinner than ¼-inch (0,5 cm). Try to roll it in a shape of a large square or rectangle so it is easier to cut. No worries you can collect the excess dough, reshape it and roll it out again to make more pop tarts.
- Don’t be afraid to patch it up! If you tear it somewhere or you get a hole, just patch it with a little bit of dough. Smooth it with your fingers, roll over it and it will still be perfect at the end.
Cutting, filling, and baking
You have your dough all rolled out now! Let’s cut!
Use a sharp knife and cut out 2.5 x 4 inch (6 x 9 cm) rectangles. Or if you want to be creative, take any large cookie cutter, and make as many pairs as you like. You can do squares, hearts, or circles, or make it festive by choosing a themed cookie cutter like Halloween or Christmas.
- Place parchment paper in your sheet pan or use a baking sheet and transfer the cut-outs from your rolling mat with the help of a slotted turner*. Gently lift them up!
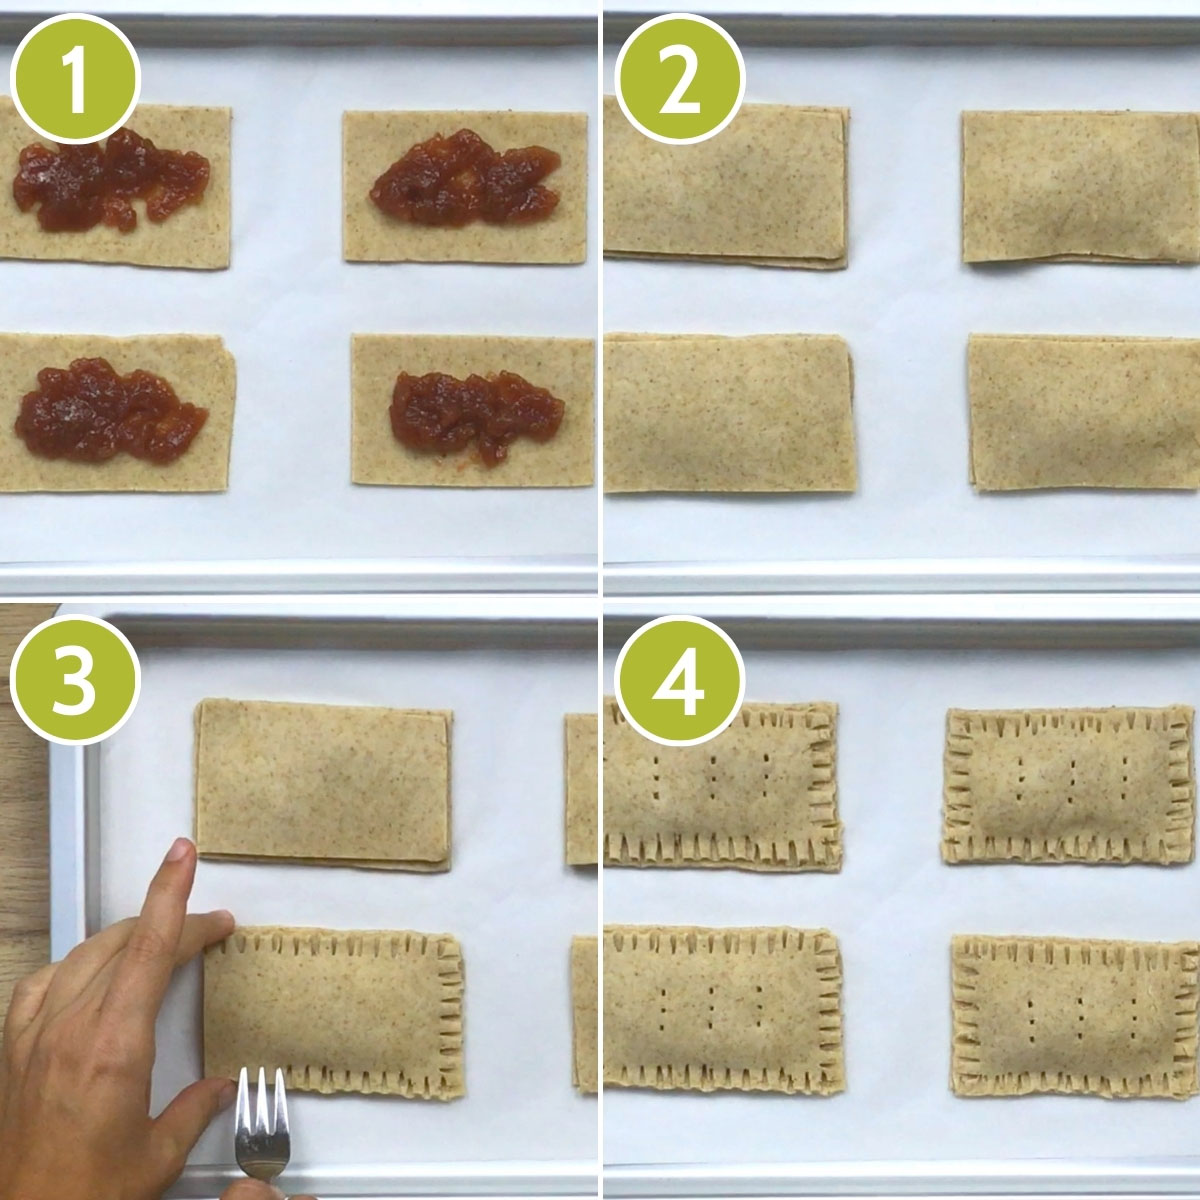
- Place the chosen filling in the middle of the cut-out (photo #1).
- Cover it with another cut-out and use your hands to gently push the edges together (photo #2).
- Use a fork to really seal all sides (photo #3).
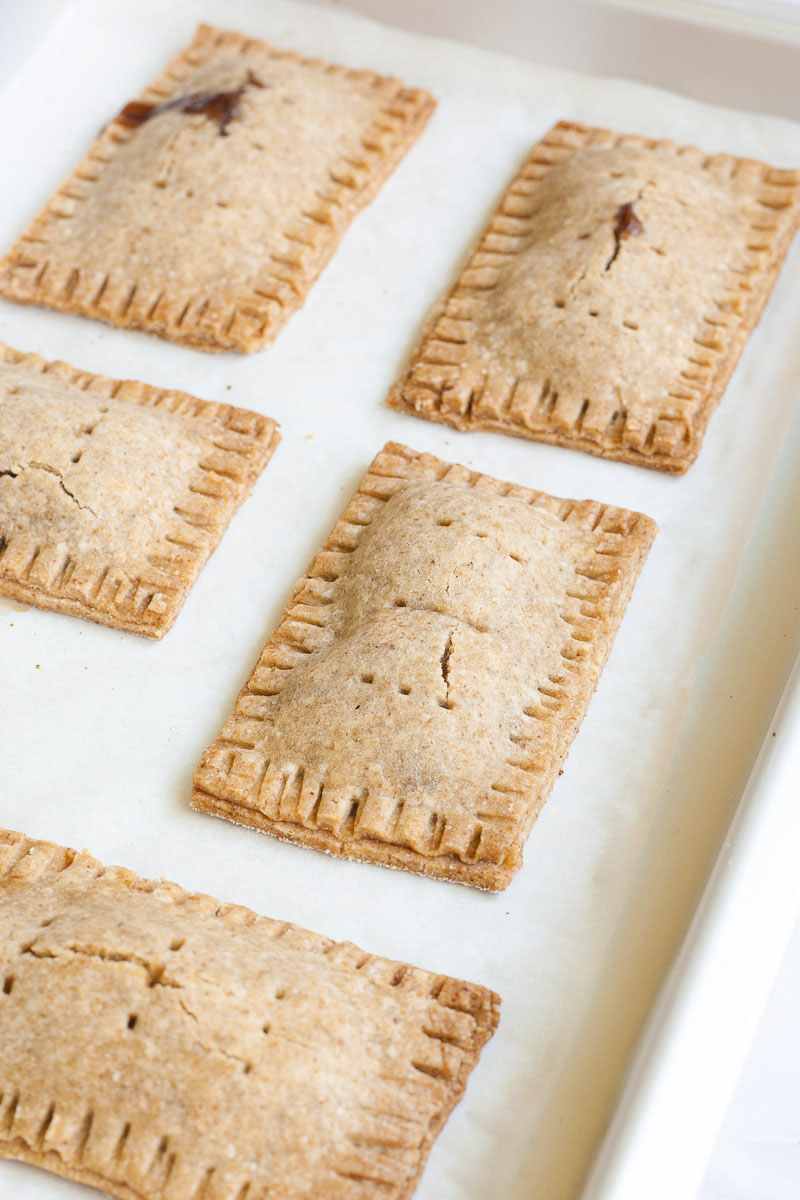
- Poke a couple of holes to let the filling breathe a bit (photo #4). The pop tarts may pop despite the holes, but I guess that is why they are called pop tarts.
- Bake them in a preheated oven at 350 Fahrenheit (180 degrees Celsius) for 20-25 minutes until they become crispy and get very light golden brown edges.
Vegan pop tart flavors
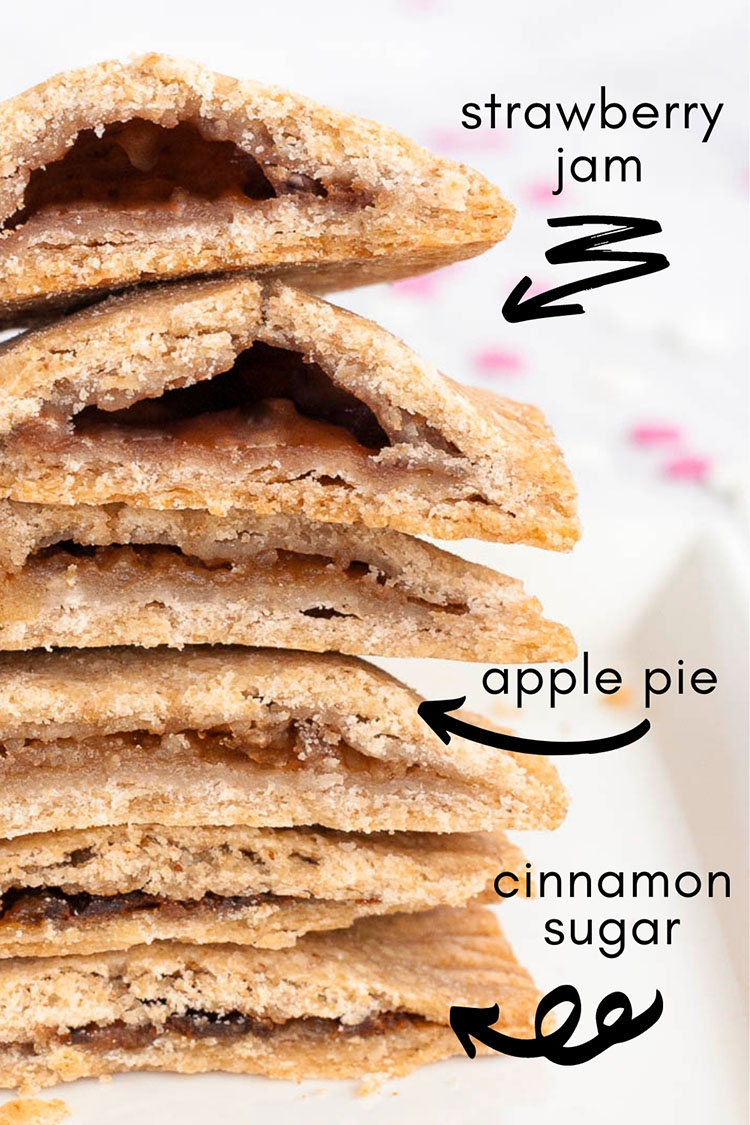
We tried and tested this recipe with 3 different vegan fillings. All of them were absolutely delicious!
Strawberry pop tarts
If you cut pop tarts in the same size as we did (2.5 x 4 inch (6 x 9 cm) rectangles), you can add 2 teaspoons of any fruit jam or preserve. May it be strawberry, blueberry, sour cherry, or apricot. Whatever you have on hand.
When you make vegan pop tarts with jam filling, make sure not to over-fill them. Due to their high sugar content, any type of jam will likely be boiling inside the pop tart during baking. They will pop the tarts open if you add too much. Poking holes on the top helps, but not necessarily. They will still be delicious though.
Cinnamon pop tarts
Take a small bowl and mix together cane sugar and cinnamon.
If you cut pop tarts the same size as we did (2.5 x 4 inch (6 x 9 cm) rectangles), then you’ll have 8 pop tarts. So mix 8 teaspoons of sugar and 1 teaspoon of cinnamon together. This is the easiest filling to make for sure. No risk of over-boiling or popping like with jams and preserves.
Apple pie pop tarts
- Wash and peel an apple. Use an apple corer and slicer* to finish fast.
- Grate the apple pieces.
- In a small bowl mix the grated apple with ½ teaspoon of cinnamon and 1 Tablespoon of cane sugar.
If you cut pop tarts in the same size as we did (2.5 x 4 inch (6 x 9 cm) rectangles), you need approx. 1 Tablespoon of cinnamon apple mix.
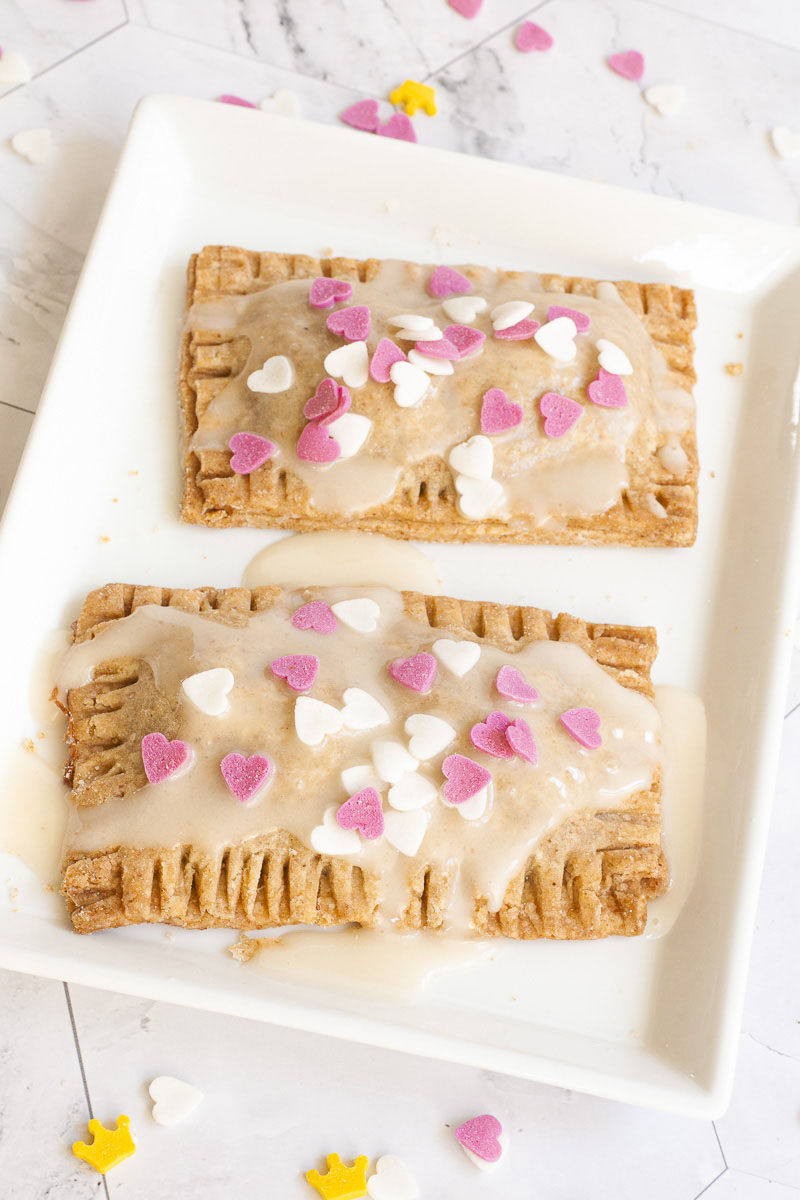
Frosting aka glaze
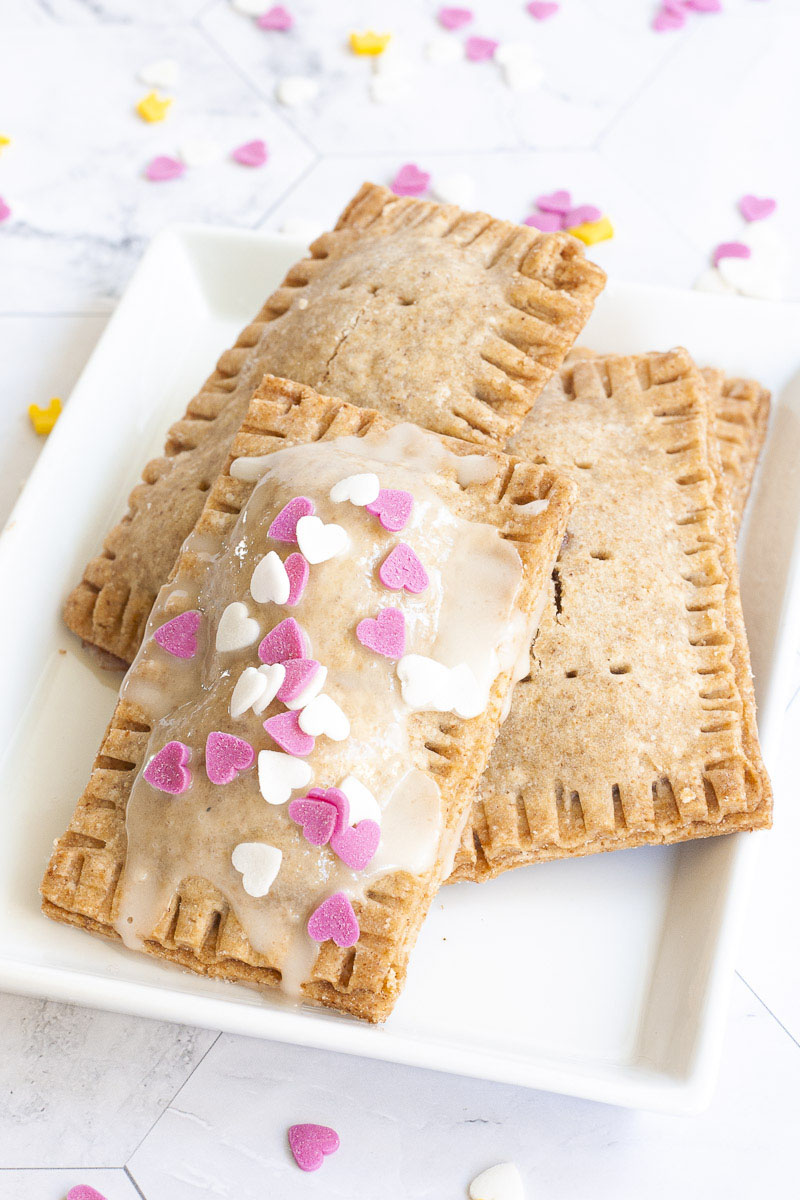
Some people like them frosted, some like them unfrosted. The easiest glaze you can make is a mix of powdered sugar (confectionary sugar) and water.
- Take a small bowl.
- Sift powdered sugar through a sieve to avoid any hard lumps.
- Add water (or dairy-free milk to get it really white) and mix it with a whisk.
- Drizzle it on top of your pop tarts. You can further decorate them with sprinkles.
- You need to place them in one layer until the glaze hardens. Otherwise, your pop tarts will stick together. It will not look nice.
FAQs
How to store them?
You can store these vegan pop tarts in an airtight container in the fridge for up to 3-4 days without a problem. It will lose its crunchy, crispy crust as time goes by. Pop them back in the toaster oven to make them crispy again.
Is it freezer friendly?
You can definitely freeze unfrosted pop tarts, but I don’t recommend freezing them together with any topping. Thaw them at room temperature completely before serving and pop them back in the toaster oven to make them crispy again.
Allergen info
This vegan pop tart recipe is dairy-free and egg-free.
- Vegan – All ingredients are supposed to be vegan.
- Nut-free – You should use dairy-free butter (aka margarine) that doesn’t use coconut oil. In any event, check the packaging for info on everything you buy.
- WFPB-friendly (whole foods plant-based) – It is not compliant since vegan butter contains oil. I haven’t tested this recipe with peanut butter, but if you do let us know in the comments.
- Gluten-free – You should pay attention to buying certified gluten-free flours, but all ingredients should be gluten-free.
- Soy-free – All ingredients are supposed to be soy-free, but be sure to check the vegan butter you chose.
More vegan dessert recipes
You can browse through our vegan dessert recipes or check out

THANK YOU so much for visiting our website. Please comment below if you have tried this recipe. We LOVE hearing from you! If you loved the recipe, please don’t forget to give us a ⭐⭐⭐⭐⭐ RATING. We appreciate all of our readers.
⇒ GET OUR FREE 7-DAY VEGAN MEAL PLAN E-BOOK NOW! OR CHECK OUT ALL VEGAN MEAL PLAN RECIPES! ⇐

Vegan Pop Tarts (3 Flavors!)
Equipment
Ingredients
Dough
- ¾ cup Buckwheat flour
- ½ cup Rice flour
- ½ cup Tapioca starch
- 3 Tbsp Cane sugar or coconut sugar
- ½ tsp Salt
- 4 oz Dairy-free butter
- 1-3 Tbsp Cold water depending on texture
Jam filling (2 teaspoons per pop tart)
- 16 tsp Jam
Apple pie filling (1 Tablespoon per pop tart)
- 1 Apple (grated)
- 1 Tbsp Cane sugar or coconut sugar
- ½ tsp Cinnamon
Cinnamon sugar (1 teaspoon per pop tart)
- 8 tsp Cane sugar or coconut sugar
- 1 tsp Cinnamon
Glaze
- ½ cup Powdered sugar (confectionary sugar)
- ½ Tbsp Water or dairy-free milk
Instructions
Mixing the dough
- Add all dry ingredients to the food processor (buckwheat flour, rice flour, cane sugar, and tapioca starch). Pulse once to combine.
- Add cold dairy-free butter in cubes and pulse until you have a crumble-like texture.
- Add cold water 1 Tablespoon at a time. The dough is perfect if 1) you can easily form a ball without any crumbles; 2) it is soft to the touch but does not stick to your fingers and 3) you can easily scrape the dough out of the container without any trace.
- Chill in the fridge for at least 15 minutes.
Rolling the dough
- Take a non-stick parchment paper or a rolling mat. Place the dough in the middle and cover it with plastic wrap.
- Roll the dough out, but not thinner than 0.5 inches. Aim for a rectangle or square shape but don’t worry if it is not perfect. If you tear it somewhere or you get a hole, just patch it with a little bit of dough. Smooth it with your fingers, roll over it, and it will still be perfect in the end.
- If you are ready with the rolling, peel off the plastic wrap. Use a sharp knife and cut out 2.5 x 4 inch (6 x 9 cm) rectangles. Or, if you want to be creative, take any large cookie cutter, and make as many pairs as you like.
- Use a slotted turner to gently transfer the cut-outs to a sheet pan with parchment paper or to a non-stick baking sheet.
Cutting, filling, and baking
- Preheat the oven to 350 Fahrenheit (180 degrees Celsius).
- Place your filling in the middle of the cut-out. Mix the filling ingredients in a separate bowl and add the amount written in the Ingredients section to every pop tart.
- Cover it with another cut-out and use your hands to gently push the edges together. Then use a fork to really seal it. Poke a couple of holes to let the filling breathe a bit.
- Bake them for 20-25 minutes until they become crispy and have light golden brown edges.
- Drizzle the glaze over the pop tarts and decorate them with sprinkles.
- Even more tips in the post above the recipe card!
Notes
Top tips
- Make sure you use cold butter and not room temperature.
- Add the butter to the food processor at last in 1×1 inch cubes so that it doesn’t stick to the sides.
- Use silicone / non-stick parchment paper. If you don’t have one, sprinkle it with a little rice flour before rolling.
- Use plastic wrap on top if the dough sticks to your rolling pin.
- You can leave the dough in the fridge overnight and roll it out the next day. No problem.
- Cane sugar can be substituted for any dry sugar, like coconut sugar. Liquid sugar like maple syrup will make the dough too wet to roll out, so might need to add more flour to get to the same consistency.
Video
Nutrition
UPDATED: This recipe was originally posted in Nov 2020. More tips, info, and detail were added and it was republished in Sep 2022.
Leave a comment