


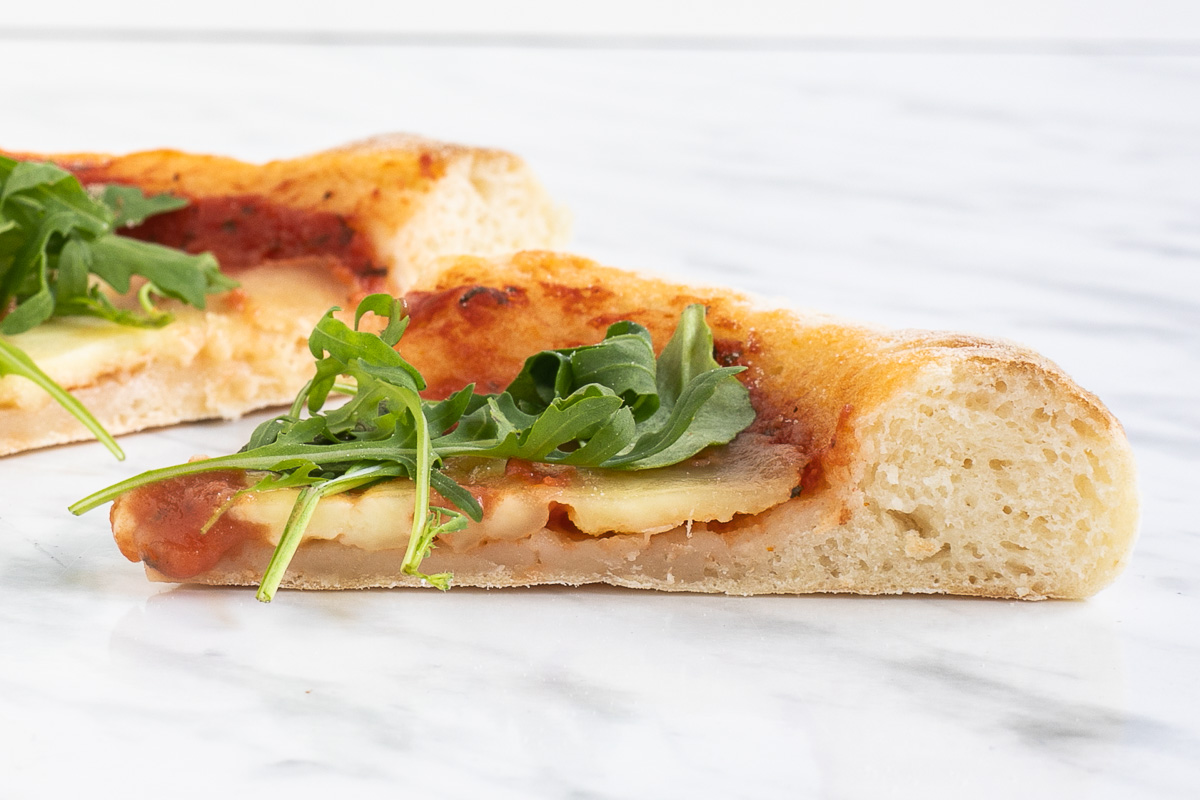
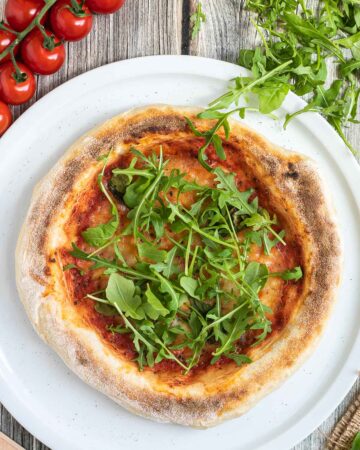
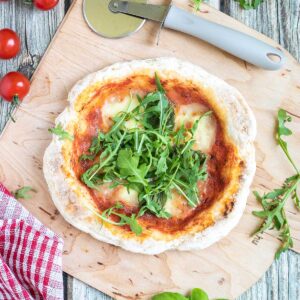
Make it a fun pizza night at home with the family with this easy-to-make, light, and airy Neapolitan gluten-free pizza crust. Made with six simple ingredients and baked to perfection, this tender and crunchy crust is so good, your guests will think it came from an Italian restaurant in Naples!
Want to save this post?
Enter your email below and get it sent straight to your inbox. Plus, I’ll send you budget recipes and money-saving tips every week!
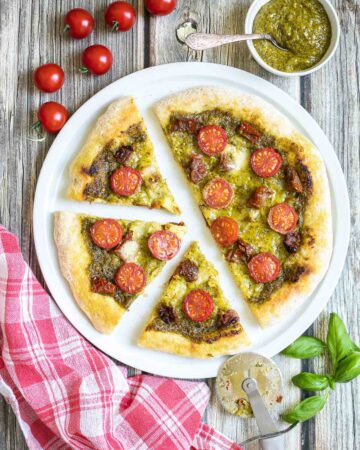
For more easy recipes to turn your homemade pizza into a pizzeria-style masterpiece, check out our pesto pizza, cheeseless pizza, and hummus pizza.
Jump to:
What to expect?
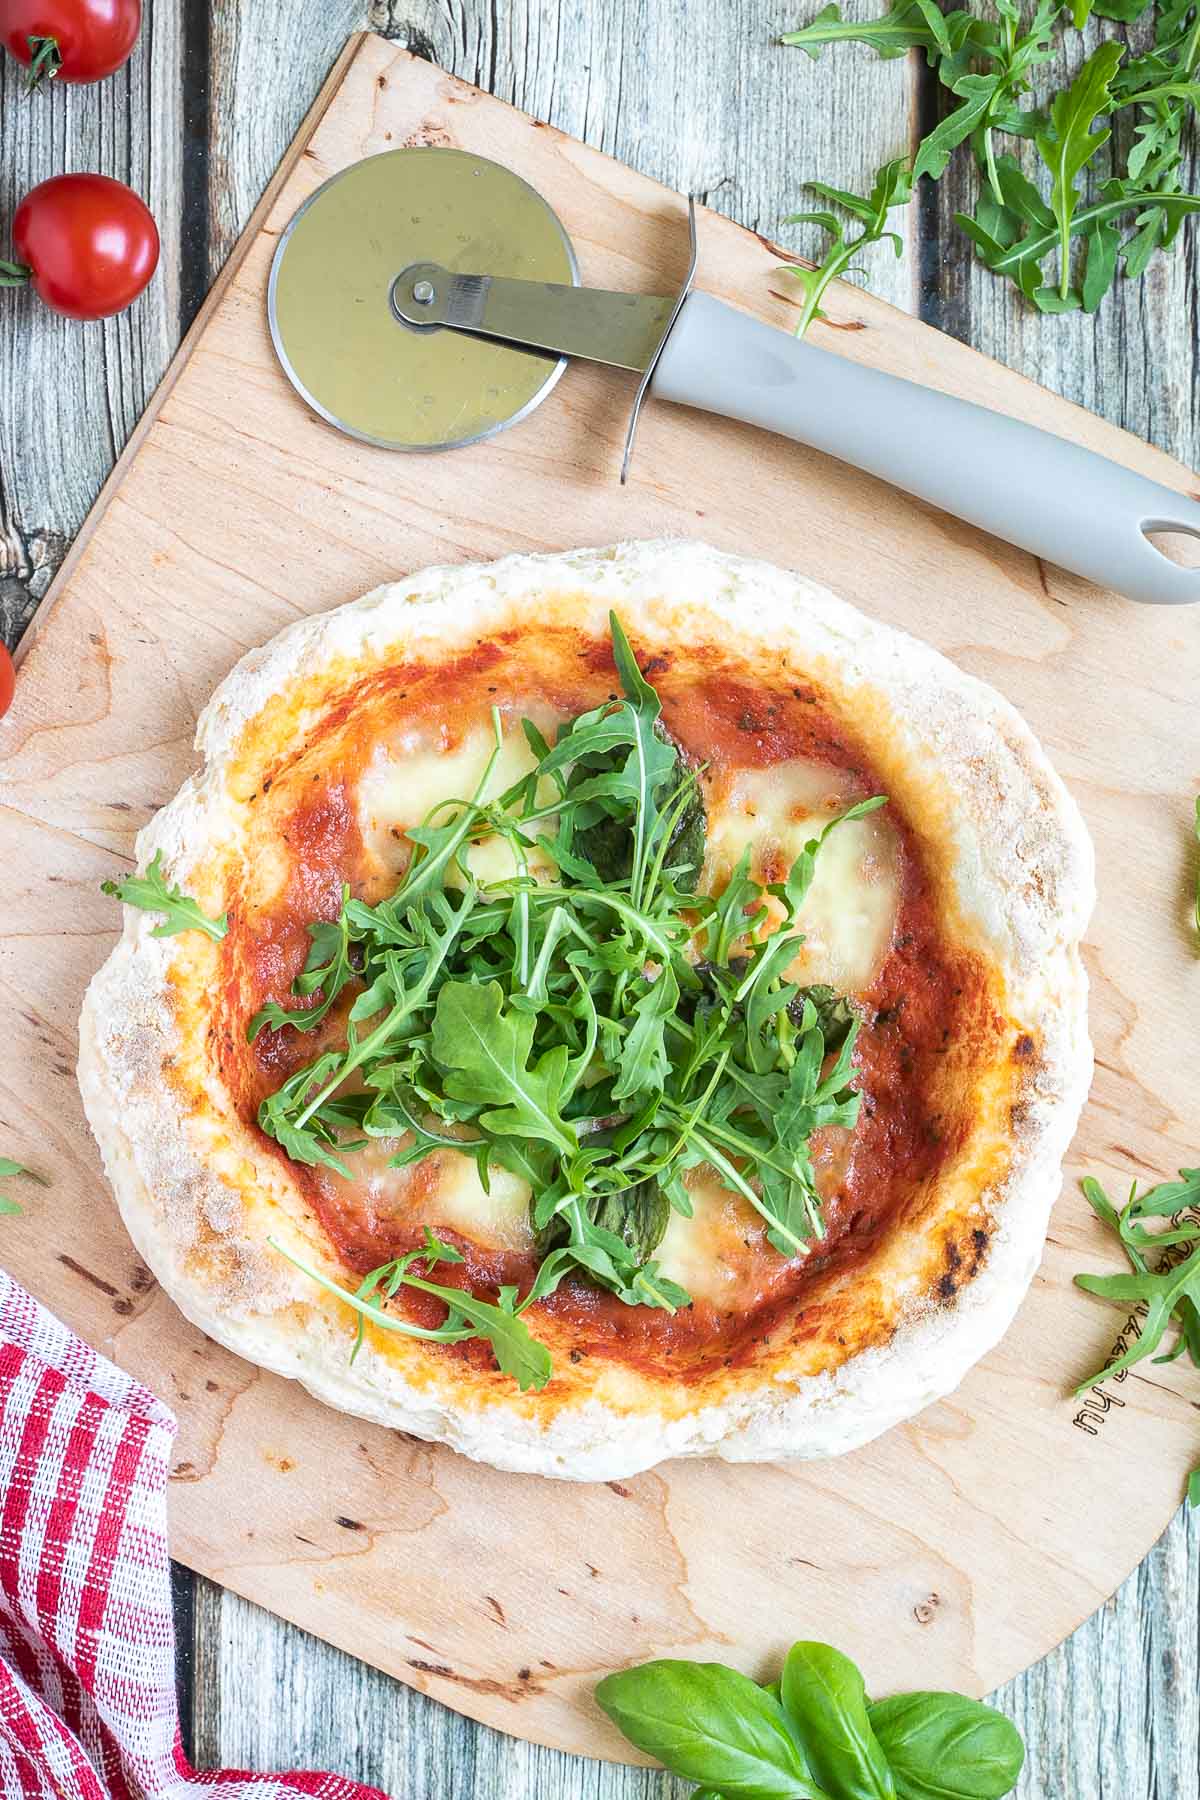
This dairy-free, gluten-free pizza dough recipe is made with an all-purpose gluten-free flour mix to create a light and airy gluten-free pizza crust that is soft on the inside with a crispy hard shell crust. Once the dough is made with six easy ingredients, it is proofed and baked using one of three ways: In a regular oven with a lined baking tray, in an oven with a pizza stone or steel pan, and in a pizza oven.
It is the best gluten-free pizza crust we have ever had, and we are sure it will be the best you have ever had! Here’s why:
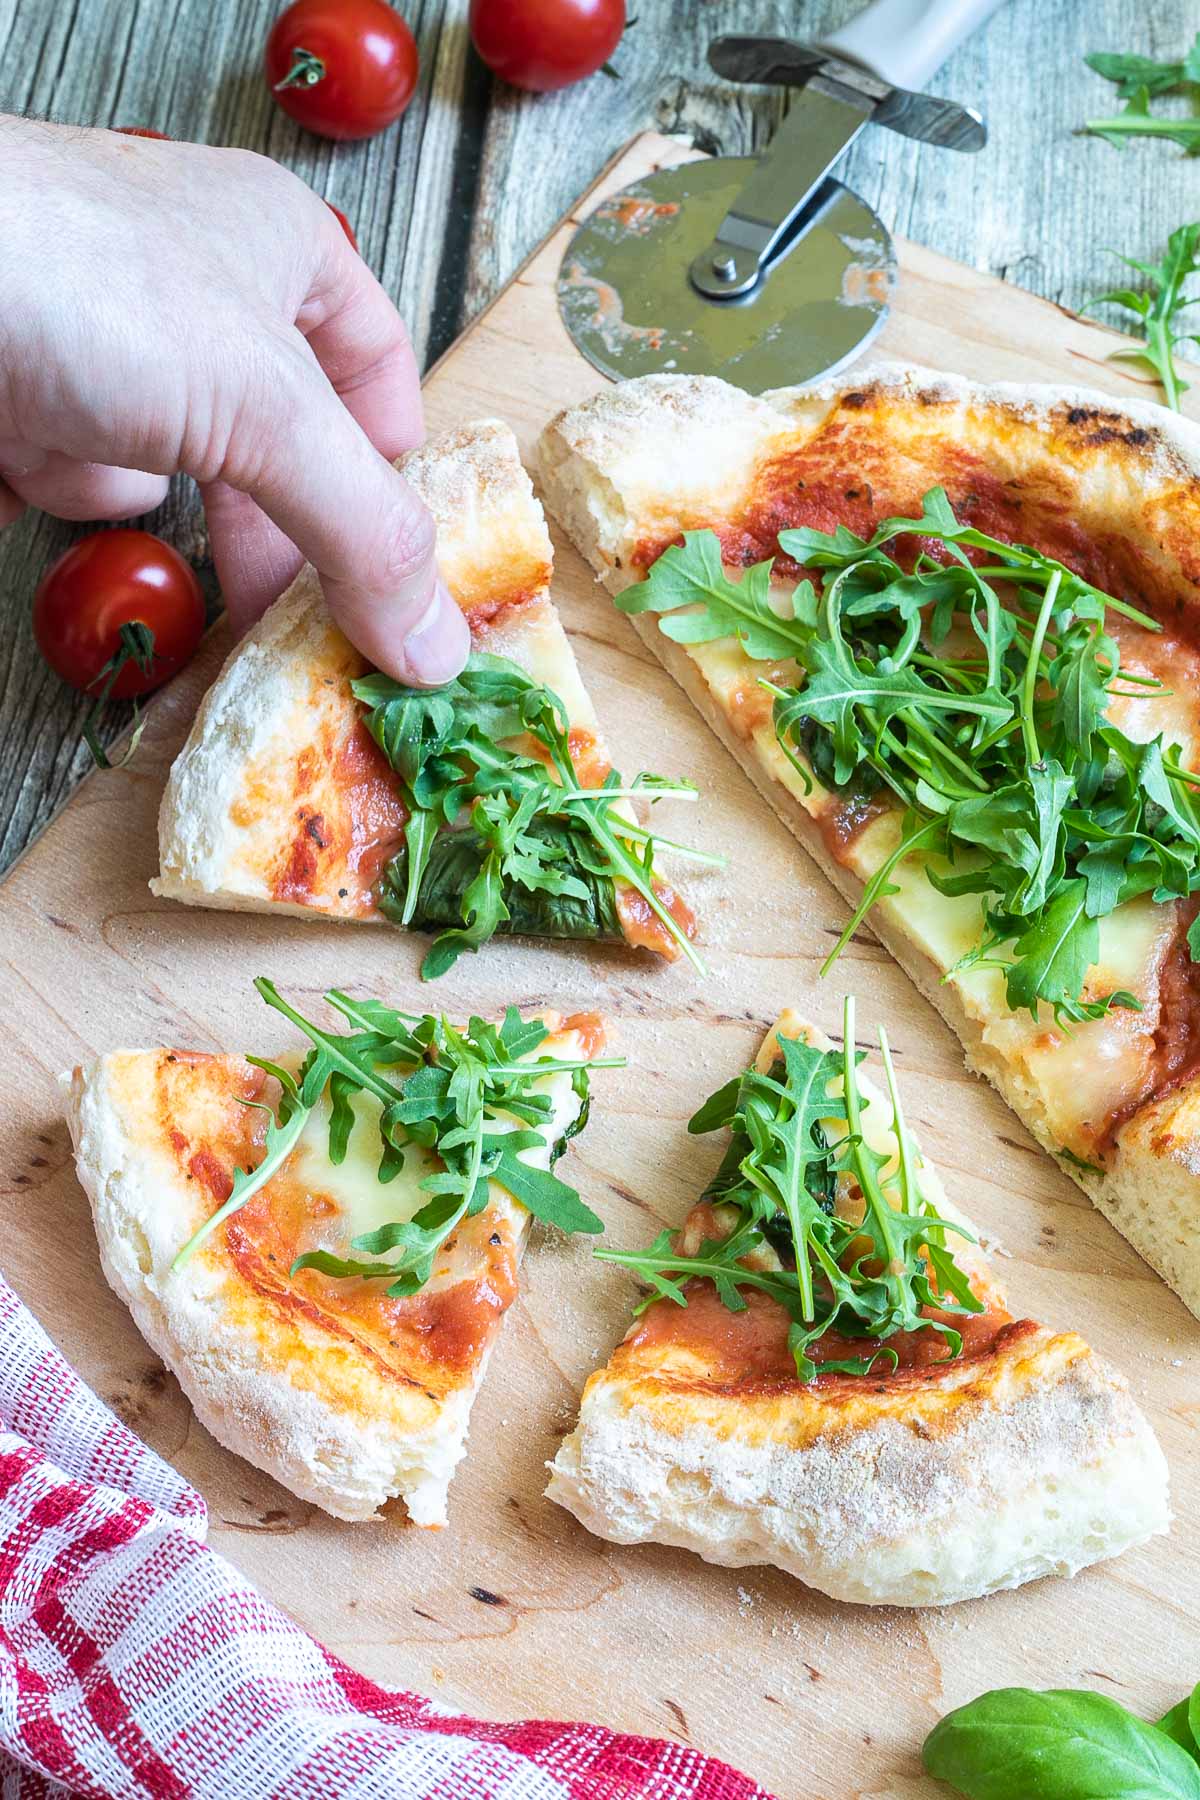
- It is delicious – The crust has the perfect texture: Soft and airy on the inside and crispy and crunchy on the outside.
- It is easy to make – This recipe only requires six simple ingredients, which you may already have in your pantry!
- There are many ways to make it – This recipe provides three different ways to bake the dough and several variations to create your perfect pizza crust.
- It has been tested and perfected – This recipe was put to the test after perfecting our Italian-style vegan pizza dough to develop a gluten-free one even tastier than the ones we found in restaurants.
- It saves you money – This crust is an excellent base for making pizza at home, keeping more money in your pockets versus delivery or eating out.
Ingredients
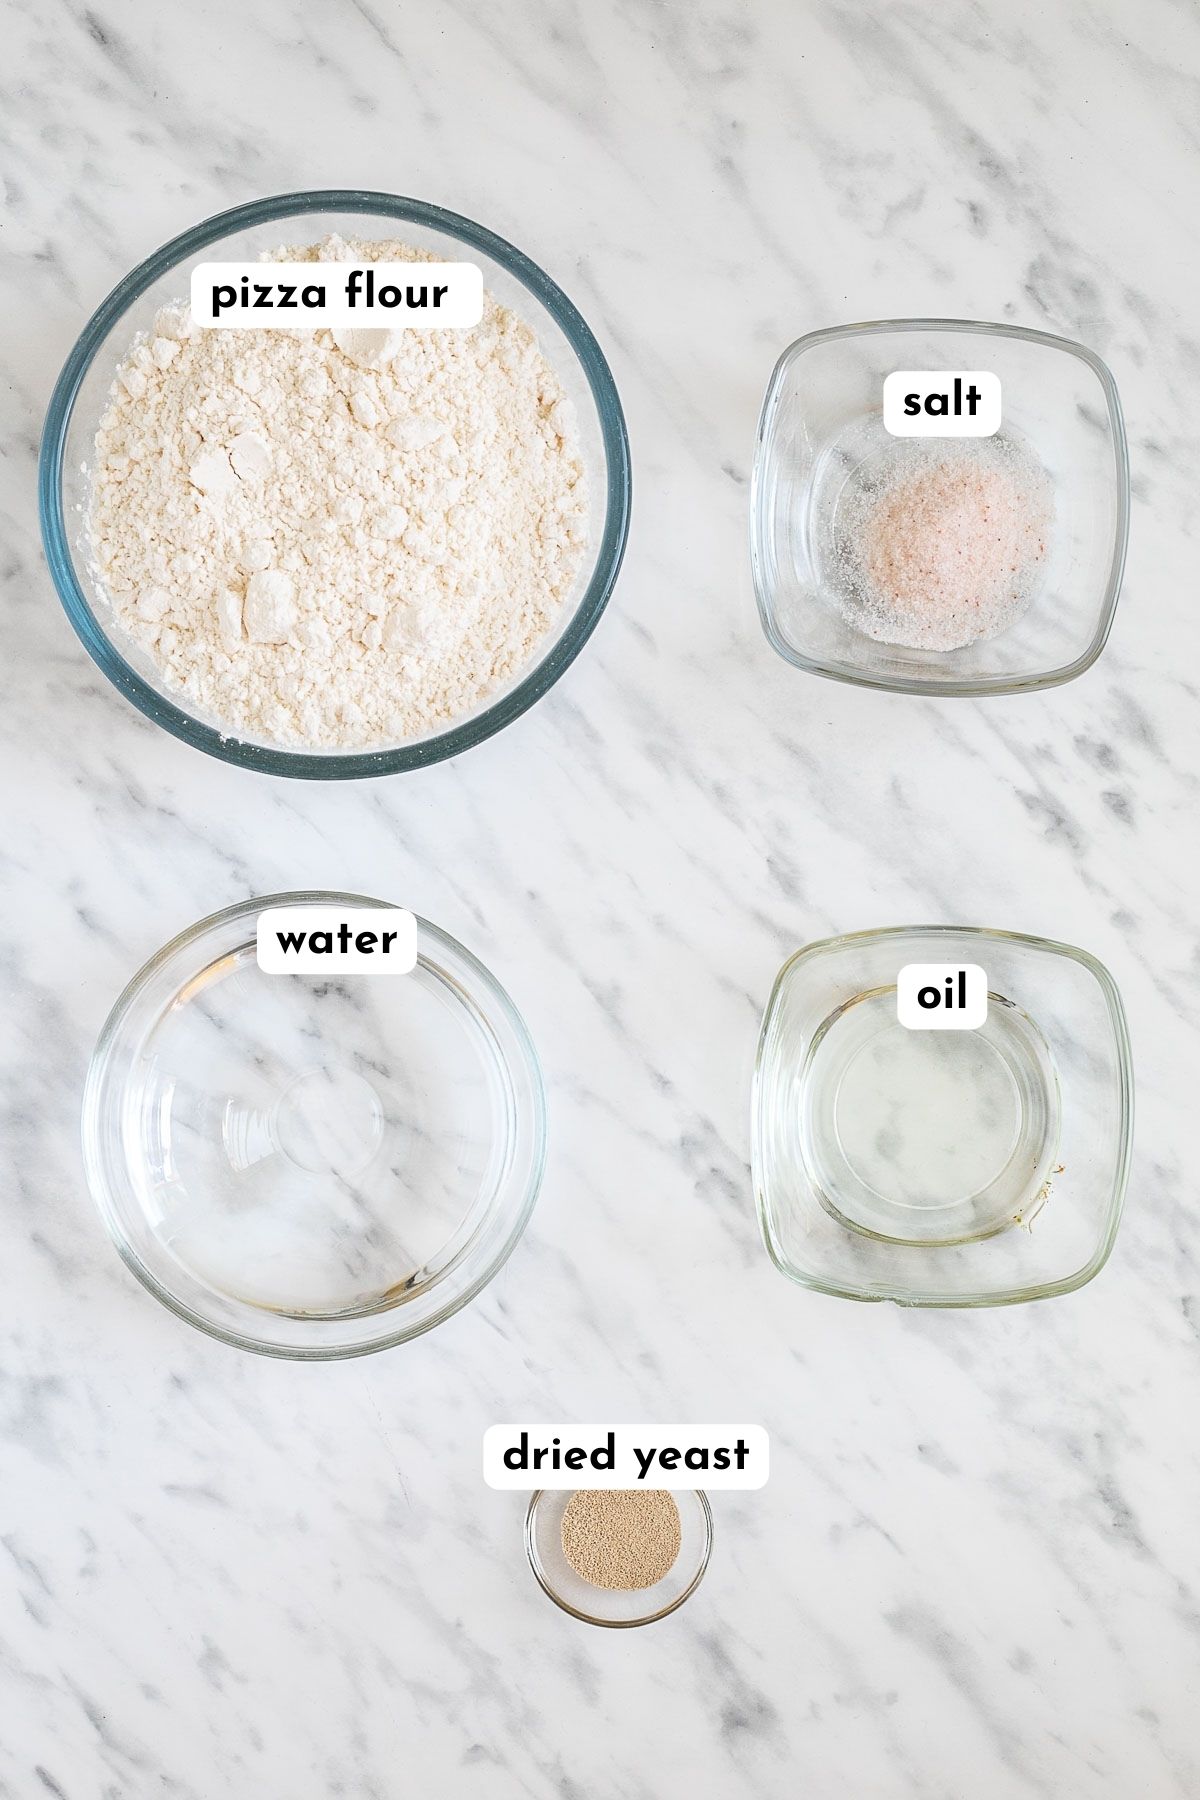
- Gluten-free flour – We prefer using Italian flour blends like Schär’s Mix B gluten-free flour or Caputo Gluten-free pizza flour. When it comes to pizza, Italians know what they are doing. I haven’t tested it with King Arthur gluten-free measure for measure flour, but it should give you a similar result based on the ingredients.
- Water
- Dry yeast – Choose a gluten-free one.
- Vegetable oil – You can also use olive oil for added taste.
- Salt
- White rice flour – You will use this for dusting. This is a grainy type, so it helps with shaping the dough.
🛒 You can find detailed measurements for all ingredients in the printable version of the recipe card at the bottom of this post.
Instructions
Making the gluten-free pizza dough
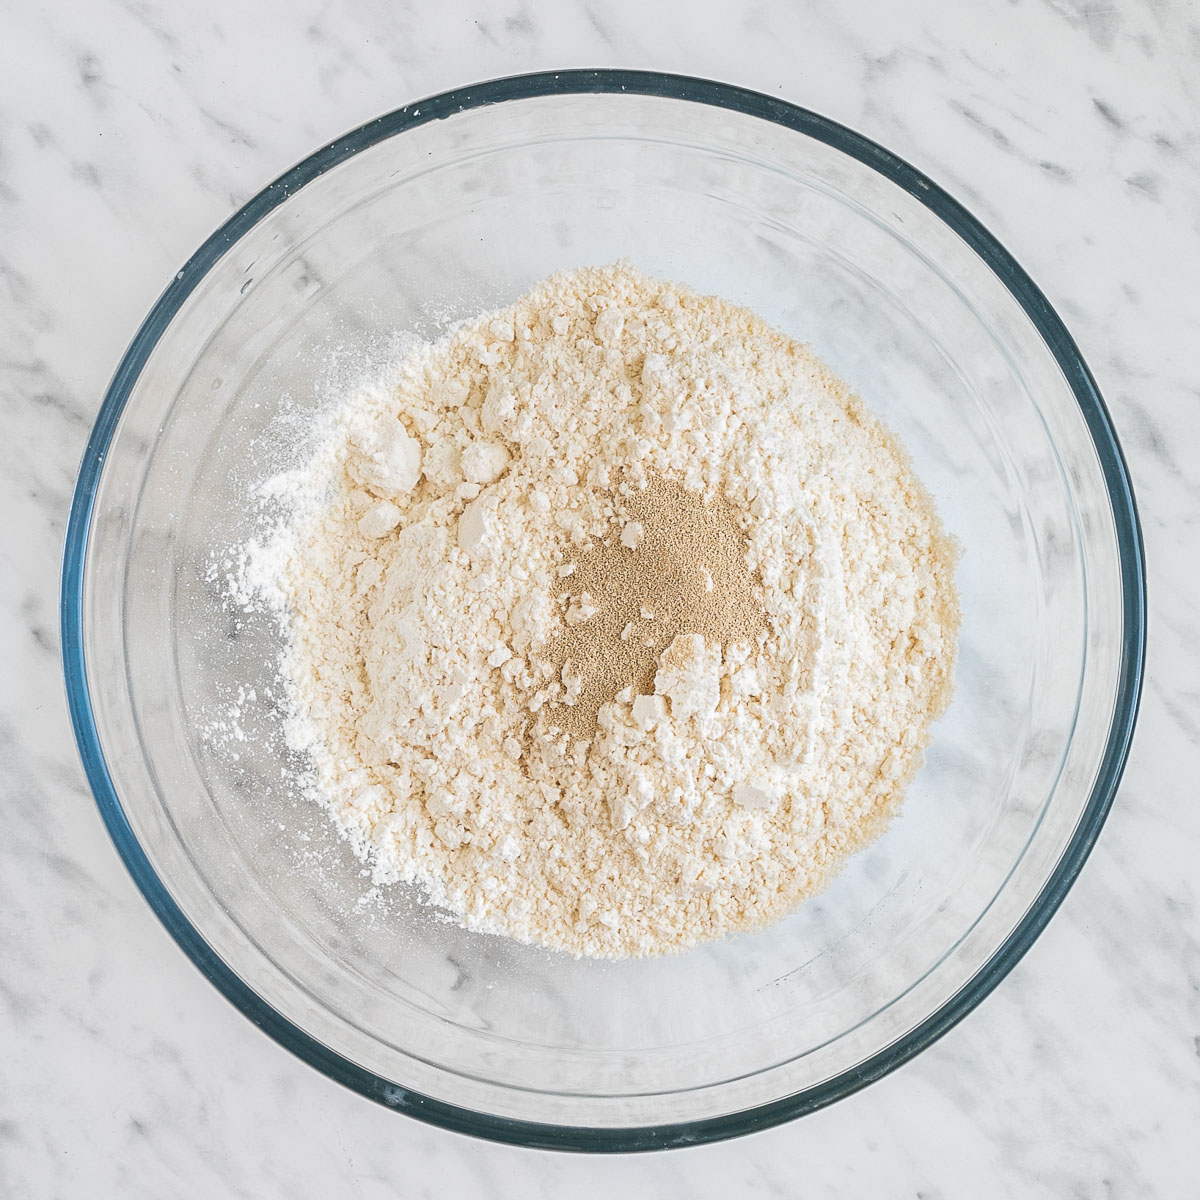
- Before starting, weigh the flour, water, dry yeast, and salt for the desired result.
- With a whisk, mix the flour and dry yeast in a large mixing bowl to loosen up the flour.
- Add lukewarm water and vegetable oil to the bowl. Use a spatula to mix the yeast mixture with the water gently. Scrape the side of the bowl occasionally to ensure all ingredients are incorporated.
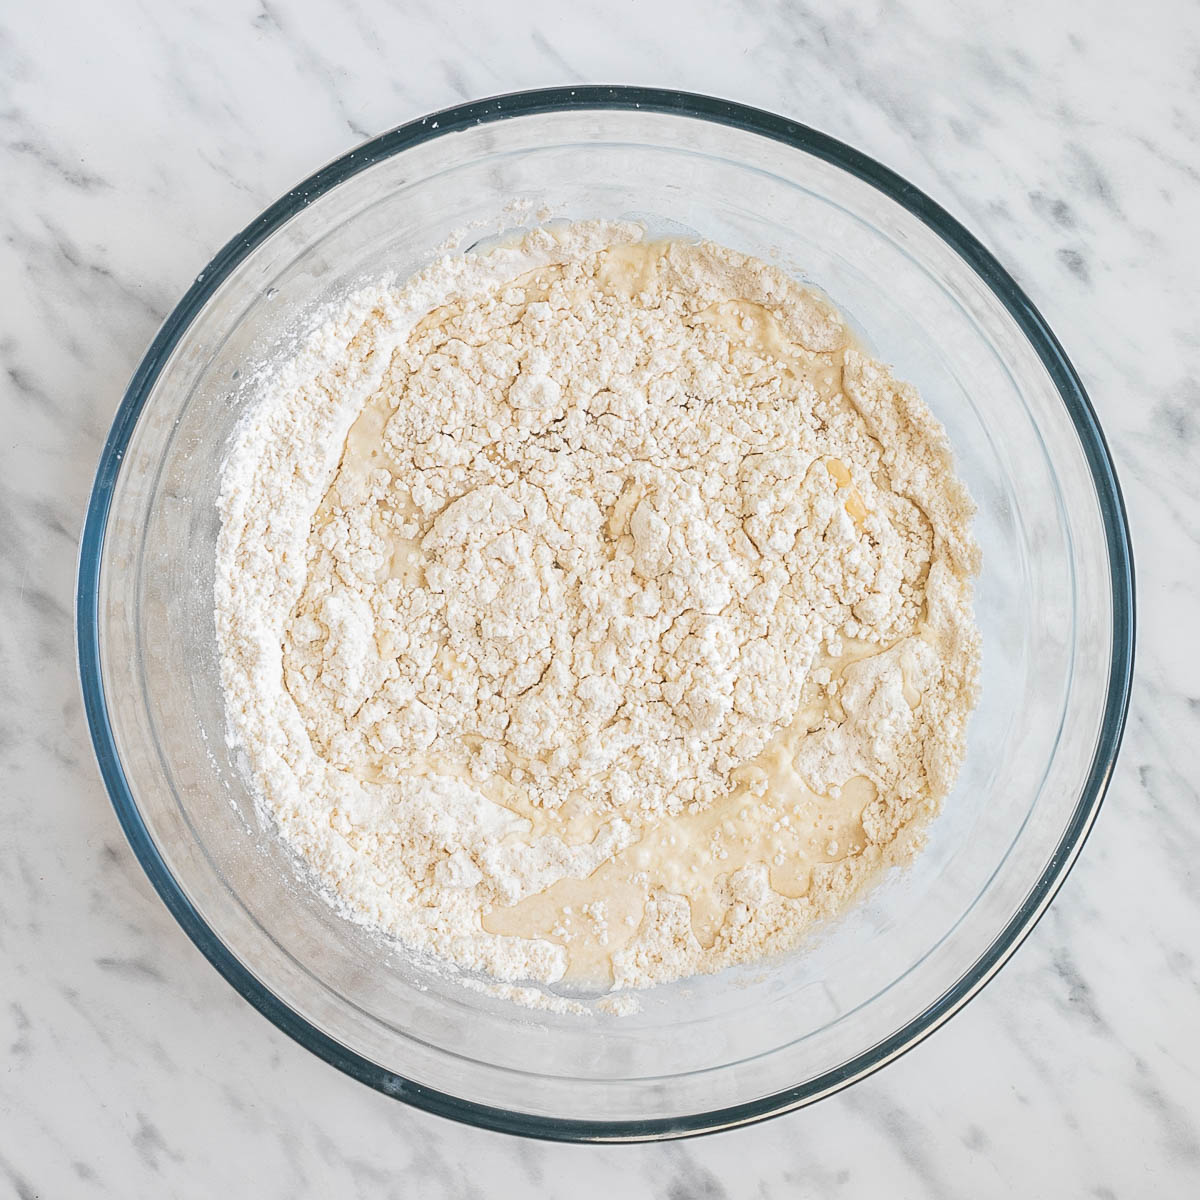
- When the flour is well mixed and becomes too difficult to mix with the spatula, switch to using your hand to knead the dough. If using a kneading machine or stand mixer, use it at a low speed.
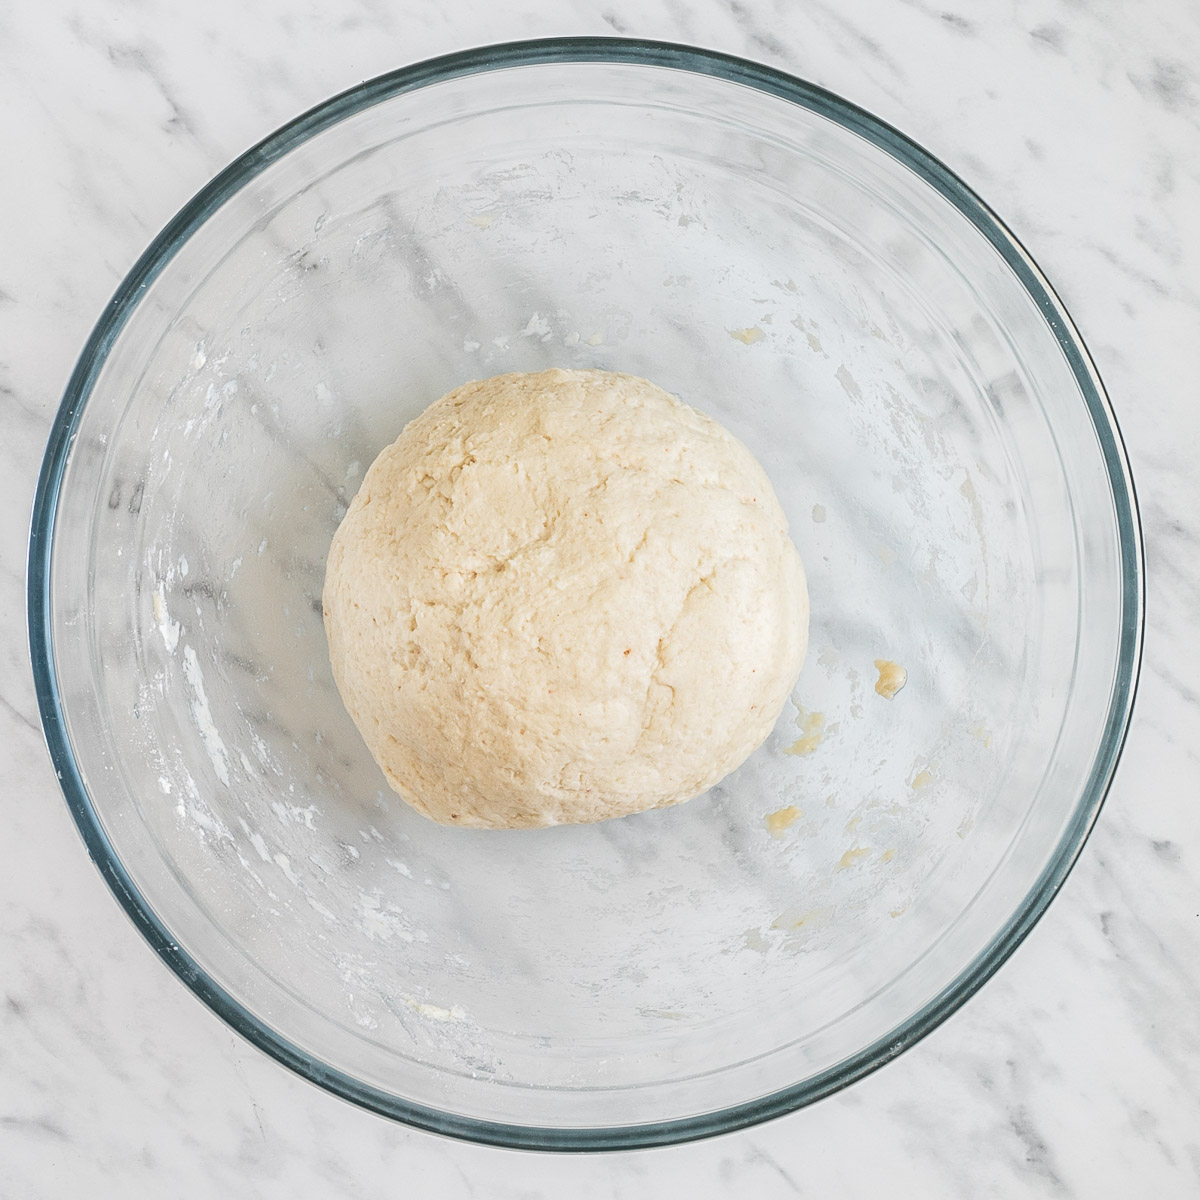
- Knead the dough for 4-5 minutes. Add the salt, squeezing it into the dough to ensure it is well-mixed. Why only now? Because salt lessens the effect of the yeast, and this way, the yeast can already work on the dough.

- Continue to knead the dough for an additional five minutes. It is ready when the dough no longer sticks to your hand and has a gluey texture that does not break apart easily when pulled.
Proofing the dough
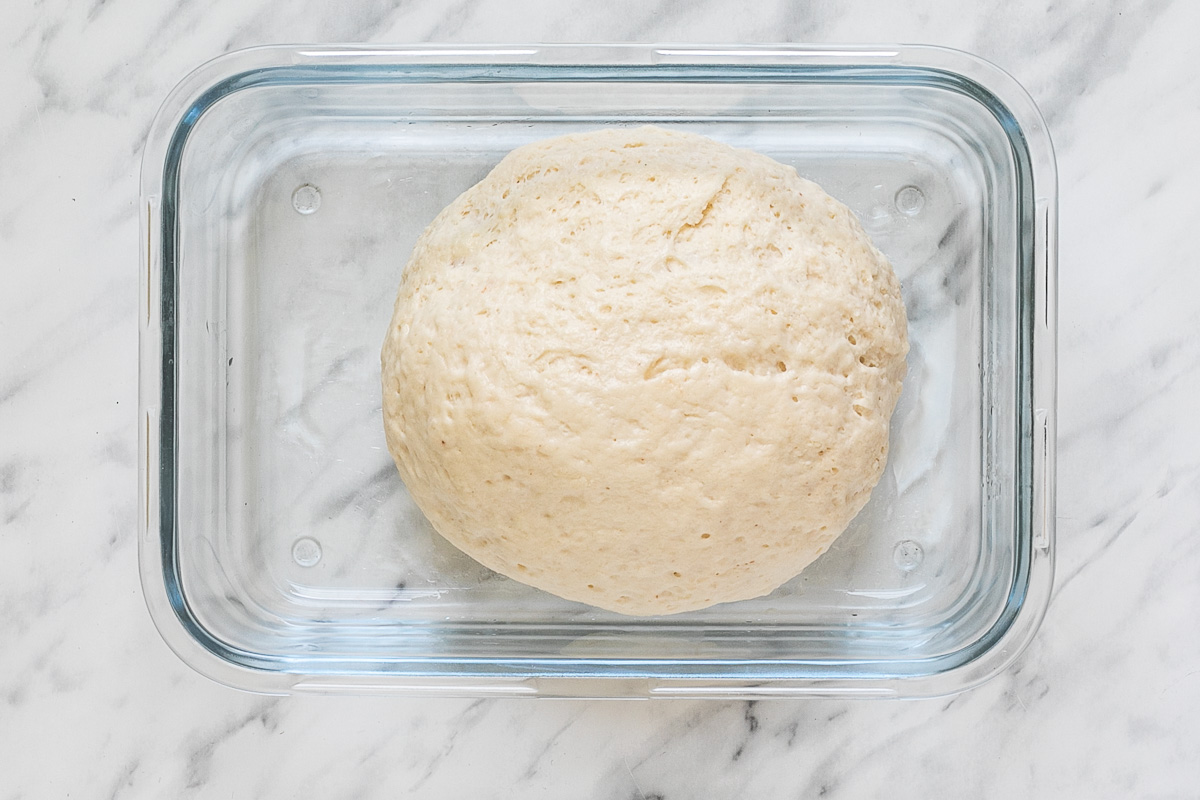
- Cover the dough with plastic wrap and let it proof at room temperature for at least one hour. The dough will rise and should double in size.
- Divide the dough into two smaller pieces using a knife or a dough scraper. Form each part into dough balls by using your hands to fold one side of the dough to the other side. Turn the dough 90 degrees and repeat until you have a smooth dough ball, trying not to press out air from the dough.
- Place the two dough balls into three separate containers. To prevent the dough from sticking, lightly spread oil across the container. Let the containers sit for 15-20 minutes, or store them in the refrigerator for up to two days until ready to use.
Shaping the pizza crust
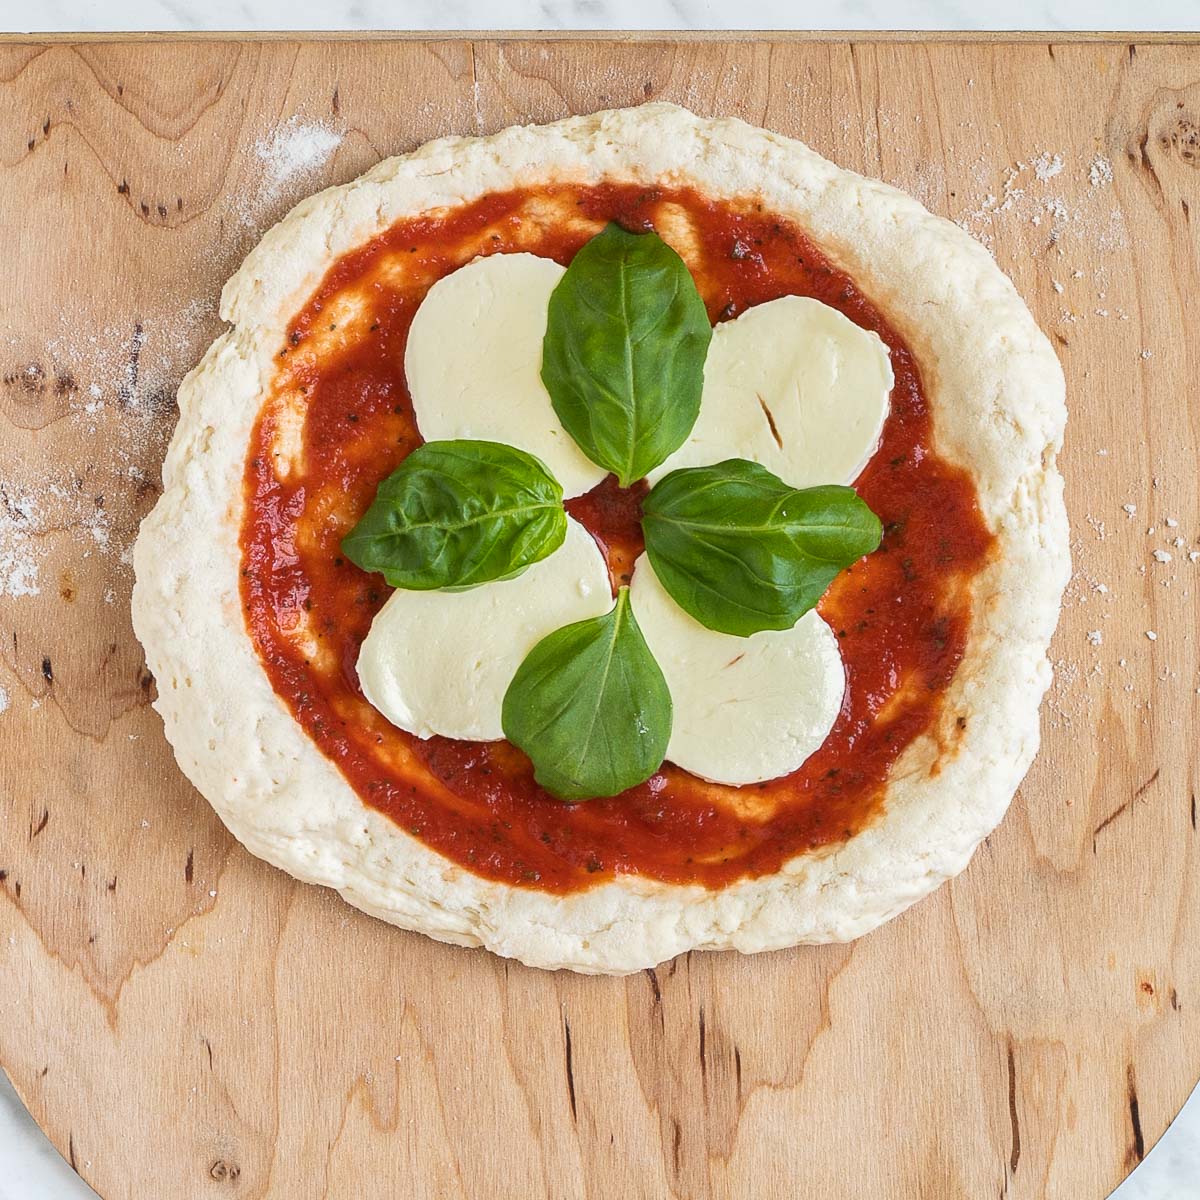
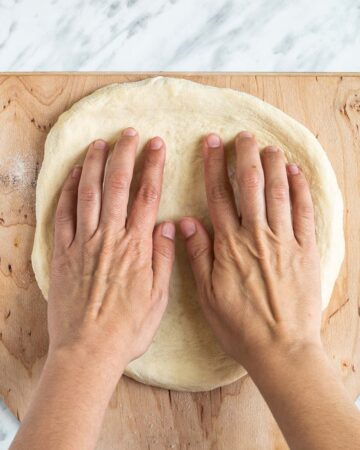
- Transfer one dough ball from the container to a flat surface dusted with rice flour. Sprinkle the top with flour, if needed (or turn the dough upside-down).
- Use your fingertips to gently depress the dough ball while stretching and pulling to create an approximately 10-inch circle. If you prefer a bubbly outer crust, do not depress the edges.

Baking on a baking tray in the oven
- Preheat the oven to 390 Fahrenheit (ca. 200 °C).
- Line a baking tray with parchment paper and transfer the pizza crust dough to the try by hand. Gently arrange it back to a circular shape.
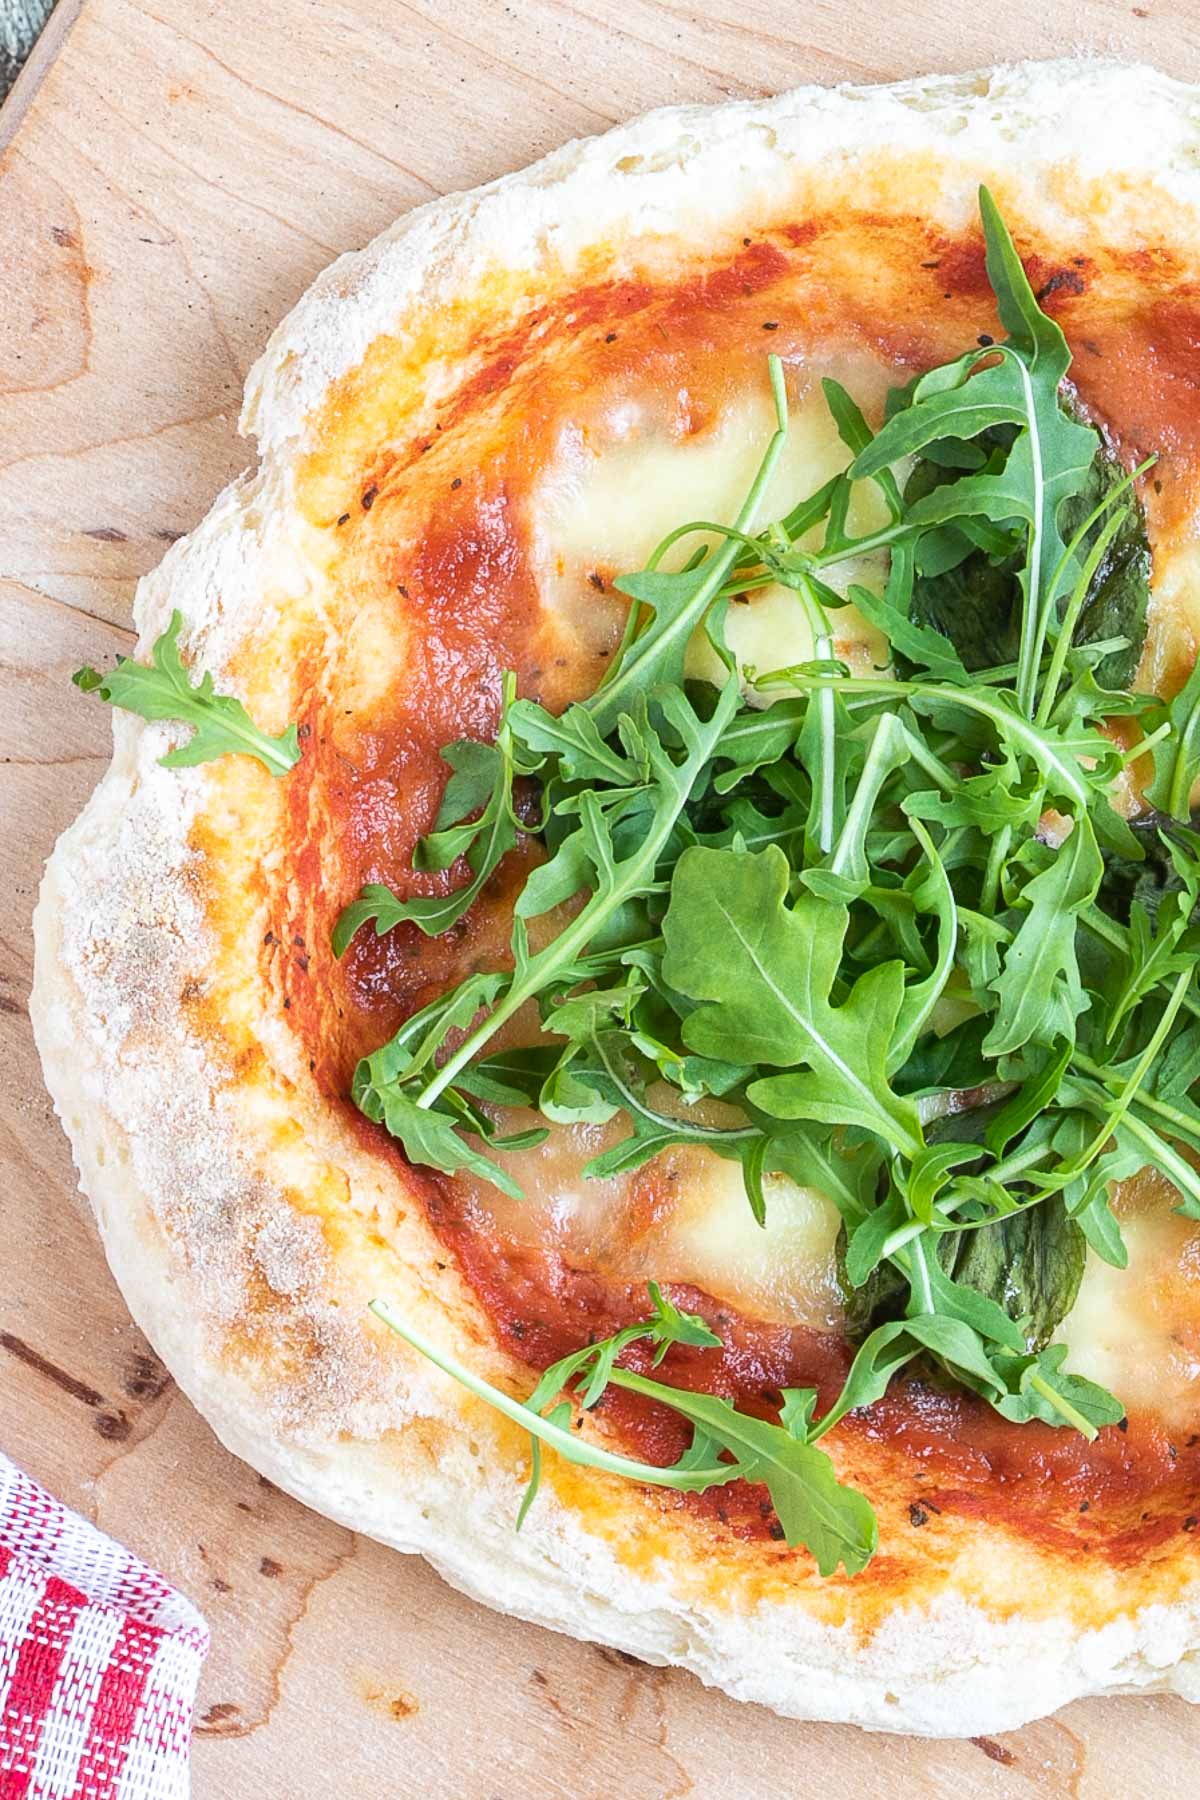
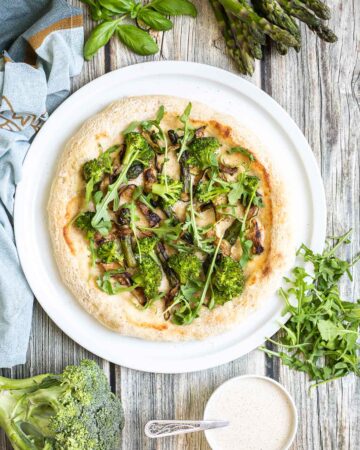
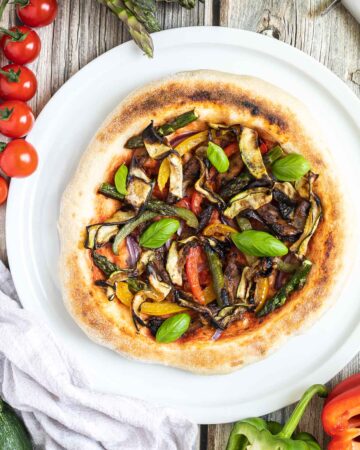
- Spread your tomato sauce of choice (such as our no-cook pizza sauce or marinara sauce) across the dough and add your favorite toppings.
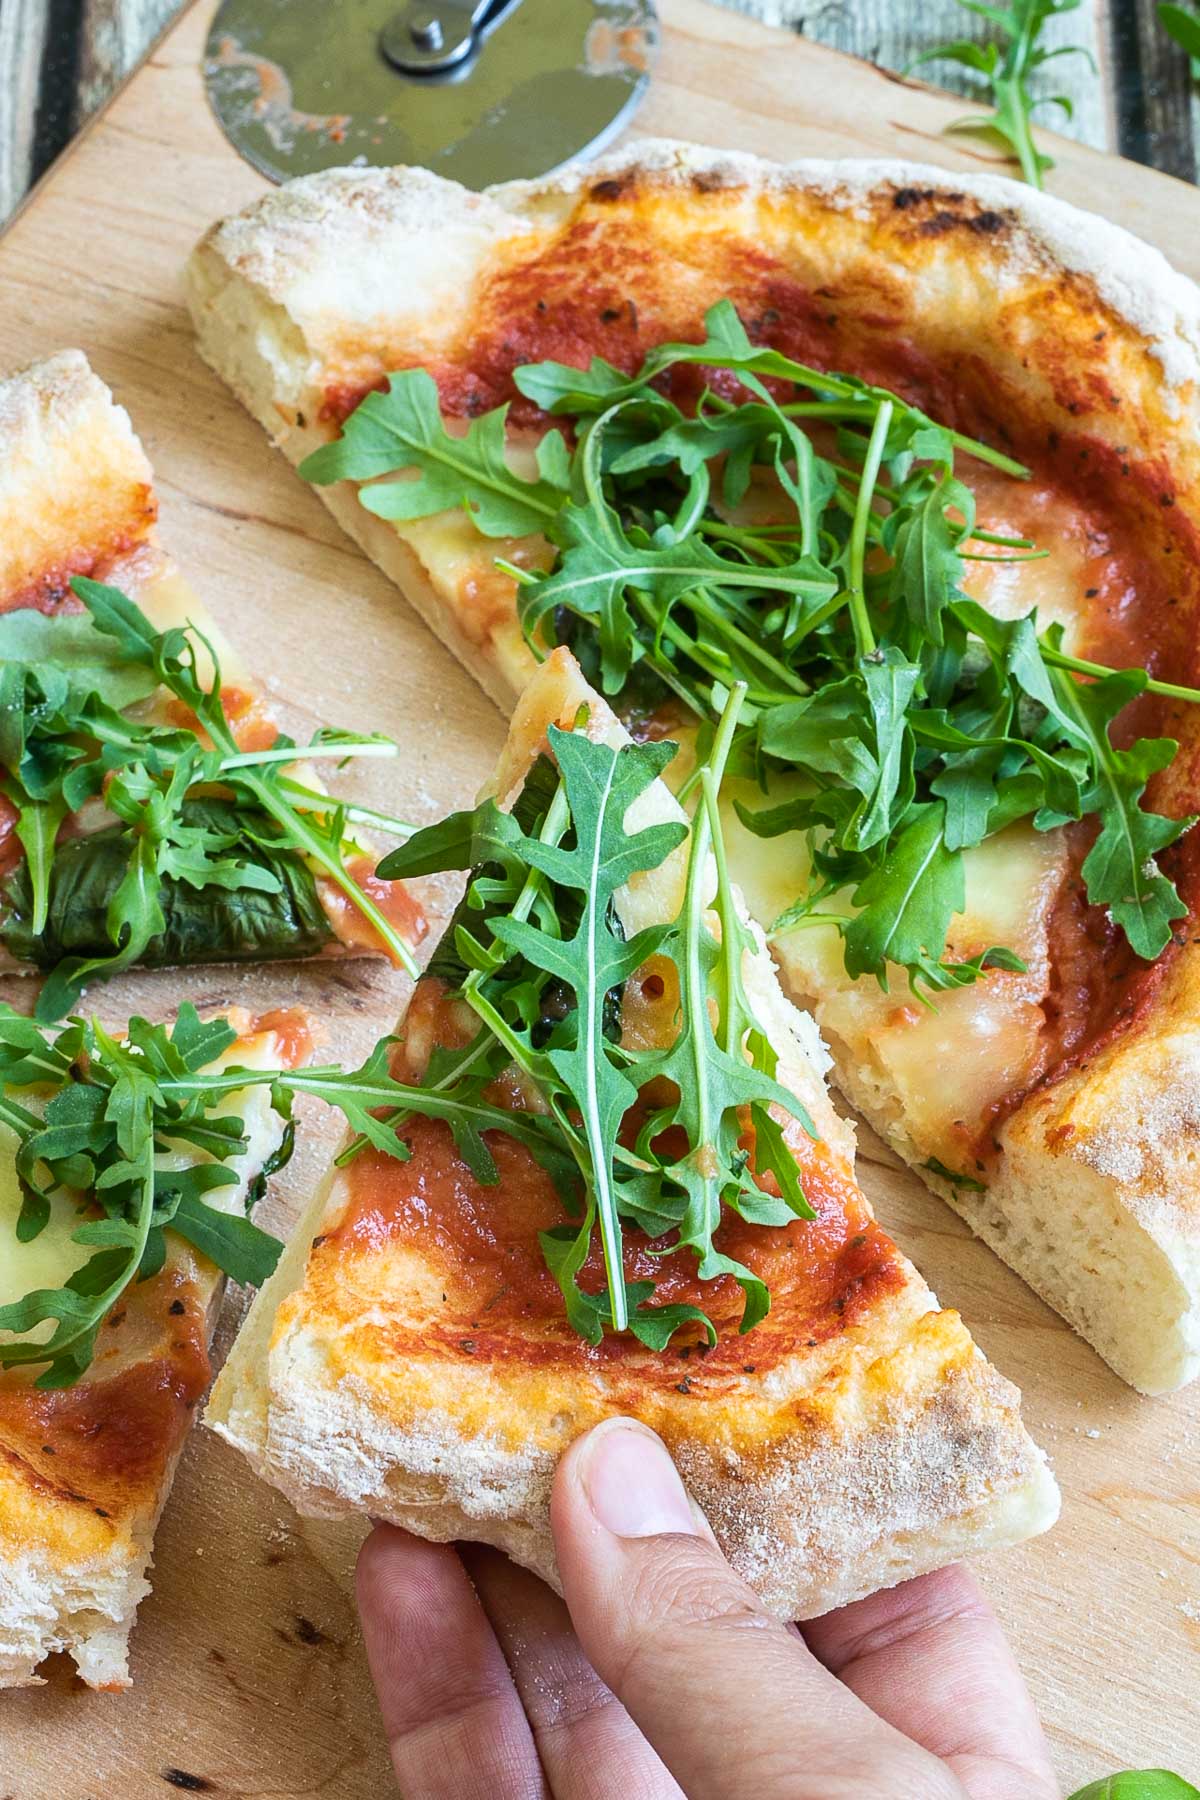
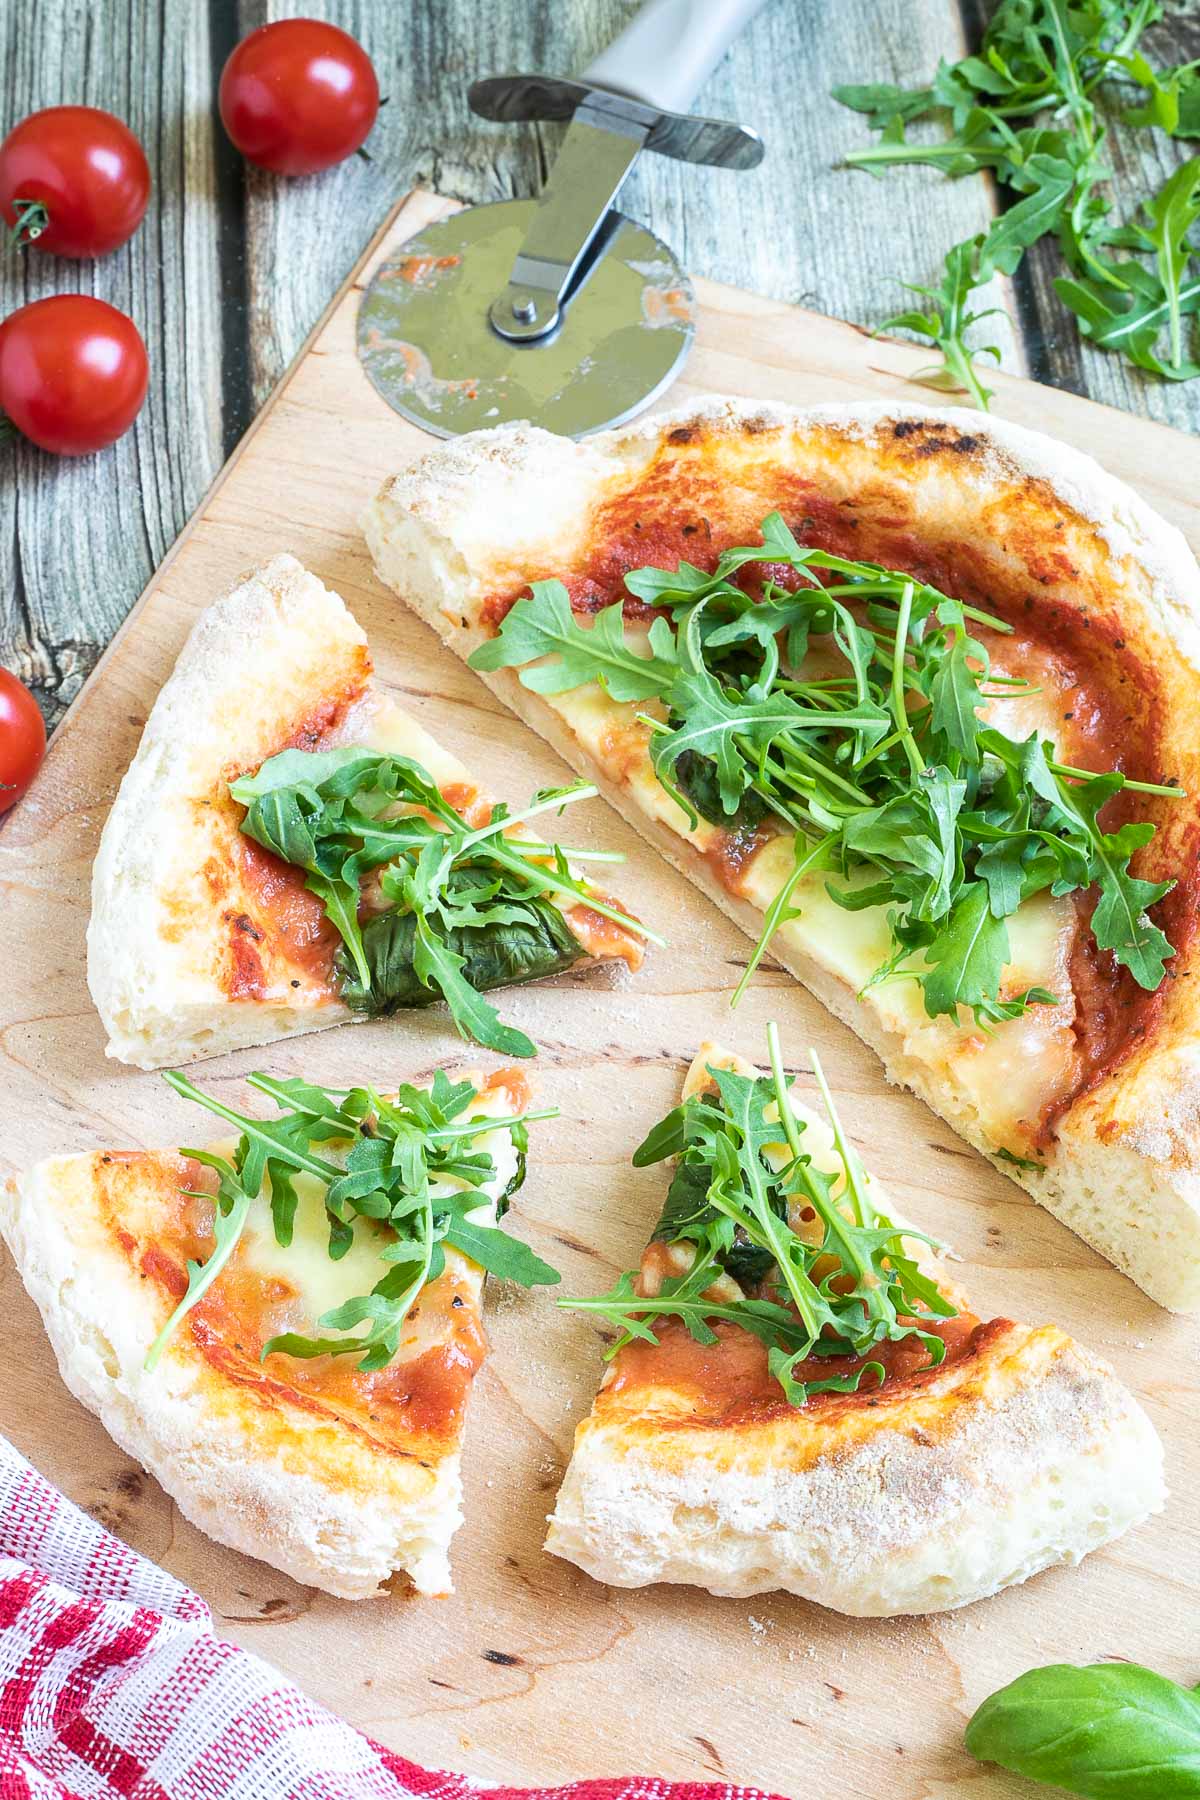
- Bake for 10-15 minutes or until the outer crust starts to turn color. Do you see the airy, fluffy crust?
Baking on a pizza stone in the oven
- Preheat the oven to 480 Fahrenheit (ca. 250 °C) for at least 45-60 minutes. Place a pizza stone in the highest position of the oven.
- Transfer the pizza crust to a lightly floured baker’s peel using your hands. Gently arrange it back to a circle shape.
- Spread your sauce of choice across the dough (no-cook pizza sauce or marinara sauce) and add your favorite toppings.
- Turn on the top broiler in the oven and transfer the topped pizza to the preheated pizza stone or steel. Bake for 6-8 minutes until the crust is firm, charred in spots, and the cheese bubbles.
Baking in a pizza oven
- Preheat the pizza oven to 840 Fahrenheit (ca. 450 °C).
- Transfer the pizza crust to a lightly floured baker’s peel using your hands. Gently arrange it back to a circle shape.
- Spread your sauce of choice across the dough (no-cook pizza sauce or marinara sauce) and add your favorite toppings.
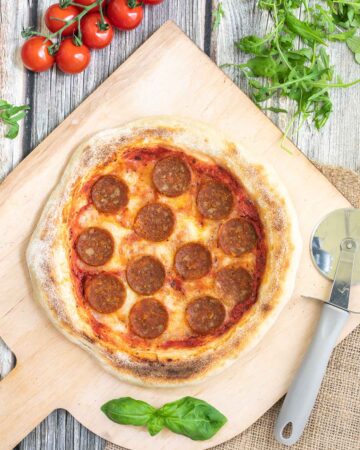
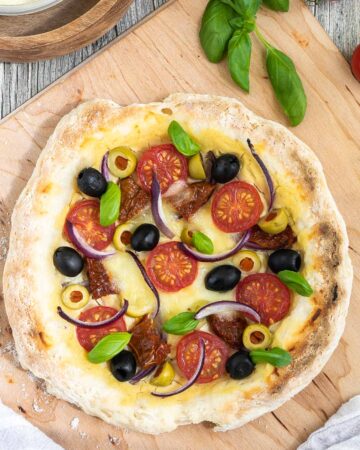
- Transfer the topped pizza to the pizza oven. Depending on the type of pizza oven, bake for 1-4 minutes until the crust is firm, charred in spots, and the cheese is bubbling. The below one is our vegan pepperoni pizza.

Cooking tips
- For the most accurate measurements and consistent results, weigh your ingredients with a digital scale.
- Do not refrigerate the dough for longer than two days. The longer it stays in the fridge, the more the yeast will overwork the dough and cause it to fall apart.
- If you prefer not to have a bubbly outer crust, poke small holes in the crust with a fork before putting it in the oven.
Variations
Take your gluten-free pizza recipe to the next level with one of these delicious variations:
- With regular pizza flour – If you are not gluten-sensitive, you can make this classic Neapolitan dough using pizza flour.
- With seasonings – Add tasty herbs and spices such as garlic powder, red pepper flakes, dried oregano, parsley, and dried or fresh basil.
- Buttered crust – Brush butter around the circumference after removing it from the oven for a delicious buttery crust.
- Thin crust – If you prefer thin, crispy dough, use a rolling pin to stretch the dough out to a 12-inch (30cm) circle.
- Cheese stuffed crust – Sprinkle cheese around the edge of the crust before rolling it over into a ring to create a gooey, cheesy stuffed crust.
Equipment
- Rolling mat
- Glass mixing bowl
- Non-stick baking sheet
- Iron pizza stone
- Baker’s peel – We have a simple wooden one, which works perfectly.
- Pizza oven – While Ooni pizza ovens are quite popular, we have a cheaper brand. And it gives us delicious pizzas effortlessly.
Storing tips
If you want to save your pizza dough for a future pizza night, the good news is that it is easy to do so! Below are some storage tips for keeping your gluten-free pizza dough nice and fresh:
In the refrigerator – After proofing, store the dough ball in an airtight container for up to two days.
In the freezer – I have not tried freezing this dough, but I have stored my fresh yeast in the freezer with no problem! After proofing and dividing the dough, wrap each piece tightly in plastic wrap, then place it inside a zippered plastic bag and into the freezer for up to three months. Defrost at room temperature for one hour before using.
FAQs
Both in the US and EU, one packet of active dry yeast is ¼ oz (7g). The one I use says on the package that 7g active dry yeast is equivalent to 25g fresh yeast, which is enough for 500g flour. In the US, one block of fresh yeast (like this one) is 2 oz (57g), but in the EU, one block of fresh yeast is 50g. This difference will not affect the result.
I prefer using the Italian Schär’s Mix B gluten-free flour, which produces wonderful results. If you do not have access to the same type of flour, I recommend any other high-quality brands like Caputo Gluten-free pizza flour or King Arthur gluten-free measure for measure flour blend.
More pizza recipes
THANK YOU so much for visiting our website. Please comment below if you have tried this recipe. We LOVE hearing from you! If you loved the recipe, please don’t forget to give us a ⭐⭐⭐⭐⭐ RATING. We appreciate all of our readers.
⇒ GET OUR FREE 7-DAY VEGAN MEAL PLAN E-BOOK NOW! OR CHECK OUT ALL VEGAN MEAL PLAN RECIPES! ⇐
The Best Gluten-free Pizza Crust
Equipment
Ingredients
- 2+½ cup Gluten-free flour mix
- 1 cup Water
- ½ tsp Dry yeast
- 1 tsp Vegetable oil
- ¾ tsp Salt
- White rice flour for dusting
Instructions
Making the gluten-free pizza dough
- Weigh your ingredients (flour, water, yeast, oil, salt) for the desired result. In a large bowl, add flour and dry yeast. With a whisk, mix the two and loosen up the flour.
- Add lukewarm water and vegetable oil to the bowl. Use a spatula to gently mix the flour with the water, scraping the side of the bowl from time to time. When it gets hard to mix it any further with the spatula (and most of the flour is already mixed), switch to using your hand. If you are using a kneading machine for this step, use it at low speed.
- Continue to knead the dough for 4-5 minutes. Now add the salt and try to squeeze it into the dough so it's mixed well. Continue to knead for another 5 minutes. The dough is ready when it no longer sticks to your hand.
Proofing the dough
- Place the dough covered with plastic wrap and proof it at room temperature for at least 1 hour. The dough should double in size.
- Divide the dough into two smaller doughs using a knife or a dough scraper. Form dough balls gently with your hands. Try not press out the air from the dough.
- Add the two dough balls into separate containers (spread some oil so the dough won't stick) and leave it there for 15-20 minutes. Or if you don't want to bake all the dough on the same day, you can put it in the fridge and store it there for up to 2 days.
Shaping a pizza crust
- Transfer one ball of dough to a flat surface dusted with rice flour. Sprinkle the top with flour if needed (or simply just turn the dough upside-down). Use your fingertips to gently depress the round, stretching and pulling the dough gently into a circa 10-inch circle. For a bubbly outer crust, don't depress the outer circumference.
Baking on a baking tray in the oven
- Preheat the oven to 390 Fahrenheit (200 degrees Celsius).
- Add parchment paper to a baking tray, and transfer the pizza crust with your hand to the tray. Gently arrange the crust back to a circle shape.
- Spread your sauce (No-Cook Pizza Sauce or Marinara Sauce), add your favorite toppings.
- Bake it for 10-15 minutes or until the outer crust gets some color.
Baking on a pizza stone in the oven
- Preheat the oven to 480 Fahrenheit (250 degrees Celsius) for at least 45-60 minutes. Place your pizza stone in the highest position in your oven.
- Transfer the pizza crust with your hand to a baker's peel. Gently arrange the crust back to a circle shape.
- Spread your sauce (No-Cook Pizza Sauce or Marinara Sauce), add your favorite toppings.
- Turn on the top broiler in your preheated oven and transfer the topped pizza to your preheated stone or steel. Bake for 6-8 minutes until the crust is firm and charred in spots and the cheese is bubbling.
Baking in a pizza oven
- Preheat the pizza oven to 840 Fahrenheit (450 degrees Celsius).
- Transfer the pizza crust with your hand to a baker's peel. Gently arrange the crust back to a circle shape.
- Spread your sauce (No-Cook Pizza Sauce or Marinara Sauce), add your favorite toppings.
- Transfer the topped pizza to your pizza oven. Depending on the exact type of your pizza oven bake for 1-4 minutes until the crust is firm and charred in spots and the cheese is bubbling.
Notes
Fresh yeast vs active dry yeast
- Both in the US and in the EU, one packet of active dry yeast is ¼ oz (7g). The one I use says on the package that 7g active dry yeast is equivalent to 25g fresh yeast, which is enough for 500g flour.
- In the US, one block of fresh yeast (like this one*) is 2 oz (57g), but in the EU, one block of fresh yeast is 50g. This difference will not affect the result.
Andrea
I love your recipes and your creative way to introduce them to your audience.
Melané Fahner Botha
I am unable to see the video! Is there a reason I can’t watch in the Netherlands?
Melané Fahner Botha
Found it on YouTube and loved the music??. Now I am off to make pizza!!! Because I load mine with veggies I will precook them and let you know! Thanks for all your work!